
How to Cook Steak in a Cast Iron Skillet and Oven Step by Step
Start with a 1- to 1½-inch steak, dry it well, season it, sear both sides in a very hot cast-iron skillet, then move the same skillet into a 400–450°F oven to finish the center. Check the steak with a thermometer rather than relying only on time, then rest it before slicing.
The biggest mistake with this method is leaving the steak on the stovetop too long before it reaches the oven. The outside can become overly dark while the center remains far behind. The stovetop phase should build the crust; the oven provides steadier heat for finishing the interior.
A cast-iron skillet works well because it stores a large amount of heat. When the steak touches the pan, the skillet stays hot enough to brown the surface rather than cooling rapidly and steaming the meat. Lodge recommends drying the steak, heating cast iron over medium-high heat, searing both sides, then moving the skillet into the oven.
Steak thickness changes the method. A steak around 1 to 1½ inches thick is well suited to searing first and finishing in the oven. A steak 2 inches thick or more may cook more evenly with a reverse-sear method, where the oven comes first and the hot skillet is used at the end.
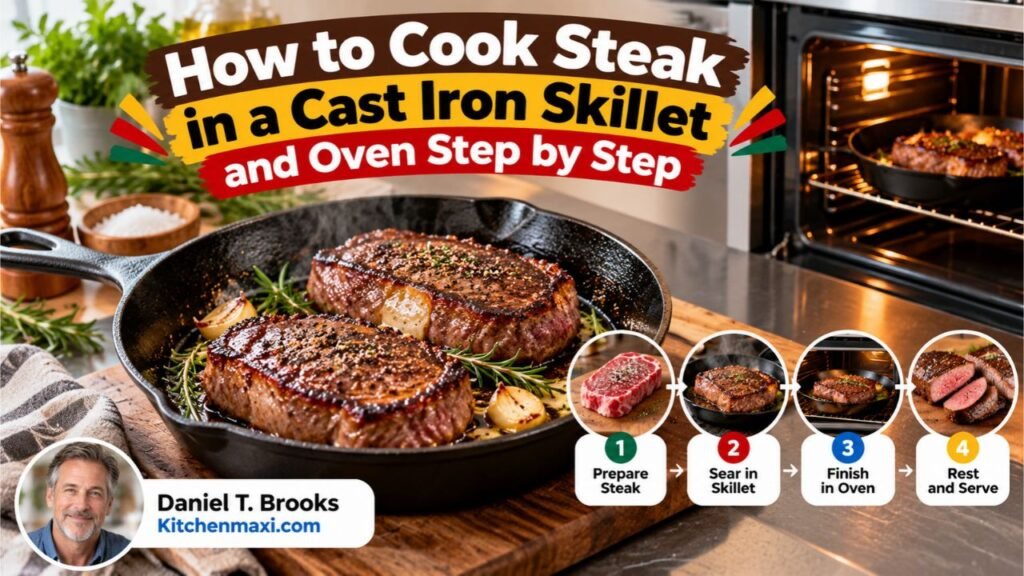
For how to cook steak in a cast iron skillet and oven, I recommend starting with a 425°F oven, a well-preheated skillet, a high-heat cooking oil, and a digital meat thermometer. Sear only long enough to build a dark brown crust, then let the oven bring the center to the desired temperature.
Cooking time should be treated as an estimate. Two steaks with the same weight can finish at different times because thickness, bone, starting temperature, fat content, skillet heat, and oven calibration all change how quickly heat reaches the center.
The full method below covers steak selection, seasoning, skillet temperature, searing, oven timing, butter basting, internal temperature, resting, cutting direction, thick steaks, and the mistakes most likely to leave the meat gray, burnt, or dry.
Best Steak Cuts and Thickness for Cast Iron and Oven Cooking
The skillet-to-oven method works best with steaks thick enough to develop a crust before the center is fully cooked.
Ribeye Steak
Ribeye is one of the easiest cuts to cook this way.
Its marbling gives you some protection against dryness, and the exterior browns well in hot cast iron.
A boneless or bone-in ribeye around 1¼ to 1½ inches thick is a strong candidate.
Very thick cowboy or tomahawk ribeyes may be easier to control with a low-temperature oven followed by a final sear.
New York Strip Steak
New York strip has a firmer texture than ribeye and usually has a strip of fat running along one edge.
Sear that fat edge briefly with tongs before laying the steak flat. Rendering some of that fat adds flavor to the skillet and improves the texture of the edge.
A strip steak around 1 to 1½ inches thick responds very well to searing and oven finishing.
Filet Mignon
Filet mignon is leaner and usually cut quite thick.
A 1½- to 2-inch filet benefits from the oven because its center needs more time than its exterior.
Sear the top, bottom, and curved edge, then finish gently in the oven.
Watch the thermometer closely because filet does not contain the same amount of marbling as ribeye.
Sirloin Steak
Top sirloin can also be cooked in cast iron and finished in the oven.
Choose a thicker steak rather than a very thin sirloin. Thin cuts often finish cooking during the stovetop sear and may not need an oven phase.
Why Steak Thickness Matters
Food Network recommends pan-searing followed by oven finishing as a fast method for thick steak and uses a 450°F oven in its thick-steak instructions. Lodge uses 350°F for a 1½-inch steak in its cast-iron method, showing that more than one oven temperature can work.
A hotter oven finishes the steak faster.
A lower oven setting gives you a larger window for checking internal temperature.
For a first attempt, 400–425°F provides a practical middle ground.
Key Takeaway: Ribeye, New York strip, filet mignon, and sirloin around 1 to 1½ inches thick work well with a stovetop sear followed by an oven finish.
What You Need to Cook Steak in a Cast Iron Skillet and Oven
You do not need many ingredients.
For two steaks, gather:
- 2 steaks, preferably 1 to 1½ inches thick
- Kosher salt
- Black pepper
- 1 to 2 tablespoons high-heat cooking oil
- 1 to 2 tablespoons butter, optional
- 2 crushed garlic cloves, optional
- Fresh thyme or rosemary, optional
Useful equipment includes:
- 10- or 12-inch cast-iron skillet
- Tongs
- Instant-read meat thermometer
- Oven mitts
- Cutting board
- Spoon for butter basting
A 12-inch skillet gives two medium-size steaks more space.
Crowding the pan can trap moisture around the meat and interfere with browning. Lodge specifically advises leaving enough room between multiple steaks so they sear rather than steam.
How to Cook Steak in a Cast Iron Skillet and Oven
This method uses the stovetop for crust formation and the oven for controlled center cooking.
1. Preheat the Oven to 425°F
Place an oven rack near the center.
Heat the oven to 425°F before starting the stovetop sear.
Food Network uses temperatures from roughly 375°F to 450°F across different sear-and-finish steak methods, while Lodge uses 350°F. The exact setting is flexible, but the oven must be fully heated before the skillet goes in.
2. Pat the Steak Completely Dry
Use paper towels to remove surface moisture from both sides and the edges.
This step has a large effect on crust formation.
Water must evaporate before the steak can brown strongly. A dry steak therefore develops color faster and spends less time over intense heat.
Food Network and Lodge both recommend drying steak before searing.
3. Season the Steak
Season both sides with kosher salt and black pepper.
You can salt shortly before cooking, or salt earlier and refrigerate the steak uncovered if you have time.
Avoid covering the surface with wet marinades immediately before searing because extra surface moisture slows browning.
For a strongly seasoned crust, do not forget the edges of a thick steak.
4. Preheat the Cast-Iron Skillet
Place the empty skillet over medium-high heat for roughly 5 minutes.
The pan should be very hot before the steak goes in.
Lodge recommends heating cast iron for about 5 to 6 minutes before searing, while Kansas City Steaks also advises around 5 minutes of high-heat preheating.
Turn on the range hood before the steak reaches the pan. High-temperature searing naturally creates smoke.
5. Add a High-Heat Oil
Add a thin film of neutral oil.
Good options include:
- Avocado oil
- Canola oil
- Grapeseed oil
- Refined vegetable oil
You need only enough to coat the contact area.
I would not begin the sear with a large amount of butter. Butter contains milk solids that can darken or burn before a thick steak is finished. Add butter later if you want to baste the meat.
6. Sear the First Side Without Moving the Steak
Lay the steak into the hot skillet away from your body to reduce splatter.
Leave it alone for about 2 minutes.
You are looking for a deep brown surface rather than a pale gray exterior.
Lodge’s current method uses approximately 2 minutes per side before moving a 1½-inch steak to the oven.
A thicker steak may need slightly longer to build the desired crust.
7. Flip and Sear the Second Side
Turn the steak with tongs.
Sear the second side for another 1½ to 2 minutes.
If the steak has a thick strip of exterior fat, hold that edge against the hot skillet for 20 to 30 seconds.
Avoid piercing the meat repeatedly with a fork.
8. Add Butter, Garlic, or Herbs if Desired
Reduce the burner slightly.
Add butter along with crushed garlic, rosemary, or thyme.
Once the butter melts and foams, tip the skillet carefully and spoon the hot butter over the steak several times.
Keep this step short so the butter and garlic do not burn.
You can skip butter completely and still produce a good steak.
9. Transfer the Cast-Iron Skillet to the Oven
Use a dry oven mitt because the handle will become extremely hot.
Place the whole skillet into the 425°F oven.
Start checking temperature early.
For a typical 1½-inch steak that has already been seared, the oven portion may take around 3 to 7 minutes, though actual time can vary considerably.
Food Network’s sear-and-oven guidance gives roughly 5 to 7 minutes as a possible finishing range for some thick steaks, while other recipes use shorter times at higher temperatures.
10. Check the Center With a Meat Thermometer
Insert the thermometer horizontally from the side into the thickest portion whenever possible.
Keep the probe away from:
- Bone
- Large fat pockets
- The skillet surface
Do not rely only on how the steak feels when pressed.
USDA recommends using a food thermometer and cooking whole beef steaks to at least 145°F, followed by a rest of at least 3 minutes.
11. Remove the Steak From the Hot Skillet
Once the steak reaches the temperature you intend to serve, transfer it to a clean board or plate.
Do not leave it sitting in the cast iron while it rests.
The skillet contains enough stored heat to continue cooking the bottom aggressively.
If following USDA food-safety guidance, the steak should already read at least 145°F before it leaves the heat source.
12. Rest Before Slicing
Rest the steak for about 5 to 10 minutes.
USDA requires a minimum 3-minute rest after beef steaks reach 145°F. Many steak recipes use a longer 5- to 10-minute rest for thicker cuts.
Do not wrap the steak tightly in foil because trapped steam can soften the crust.
13. Slice Against the Grain
Look at the direction of the muscle fibers.
Cut across those fibers rather than parallel to them.
For a ribeye or filet, you may prefer serving the steak whole. For sirloin or strip, slicing against the grain can make each bite feel more tender.
Key Takeaway: Dry the steak, sear it in a fully heated skillet, finish it in a 425°F oven, check the center with a thermometer, move it out of the hot pan, and rest before slicing.
Cast Iron Steak Oven Temperature and Cooking Time
There is no single cooking time that works for every steak.
Thickness matters more than weight.
Starting Time Guide for 425°F Oven Finishing
The ranges below assume the steak has already been seared on both sides.
| Steak Thickness | Stovetop Sear | Start Checking in Oven |
| 3/4 inch | About 1–2 min per side | May not need oven |
| 1 inch | About 2 min per side | After 1–3 min |
| 1¼ inches | About 2 min per side | After 3–4 min |
| 1½ inches | About 2 min per side | After 4–5 min |
| 2 inches | About 2–3 min per side | Consider reverse sear |
These are starting points, not finish guarantees.
Food Network’s thick-steak method uses a 450°F oven after the sear and tells cooks to use a digital thermometer rather than time alone. Lodge gives a shorter oven finish for a 1½-inch steak at 350°F.
Why Oven Time Varies
Two 1½-inch steaks can cook at different rates because of:
- Bone-in versus boneless construction
- Ribeye fat content
- Starting meat temperature
- Skillet temperature
- Oven accuracy
- Steak shape
- Number of steaks in the pan
Check earlier than you think is necessary.
You can always put an undercooked steak back into the oven. Correcting an overcooked one is not possible.
Steak Doneness and Internal Temperature
Doneness preference and federal food-safety guidance should be treated separately.
USDA Safe Minimum for Whole Beef Steak
USDA recommends cooking beef steaks to a minimum internal temperature of:
145°F, followed by at least a 3-minute rest.
That recommendation applies to raw beef steaks, chops, and roasts.
Common Culinary Doneness Ranges
Steak restaurants and recipes commonly use temperature ranges like these:
| Doneness Label | Common Culinary Range |
| Rare | About 120–125°F |
| Medium-rare | About 130–135°F |
| Medium | About 140–145°F |
| Medium-well | About 150–155°F |
| Well-done | About 160°F+ |
Kansas City Steaks uses similar ranges, listing roughly 125°F for rare, 135°F for medium-rare, 145°F for medium, 155°F for medium-well, and 165°F for well-done.
Safety Note: Rare and medium-rare culinary temperatures fall below USDA’s recommended 145°F minimum for whole beef steak. If following USDA guidance, cook the steak to at least 145°F and give it a minimum 3-minute rest.
Why Sear Steak Before Finishing It in the Oven?
The two heat sources perform different jobs.
The Cast-Iron Skillet Builds the Crust
Strong surface heat drives browning on the exterior.
That produces the dark, savory crust associated with pan-seared steak.
A cool or crowded skillet does the opposite. Moisture collects, and the surface stays gray for longer.
The Oven Finishes the Center More Gently
Once the crust has formed, the steak no longer needs maximum direct heat.
The oven surrounds it with hot air and continues moving heat toward the center.
Martha Stewart’s pan-seared steak method uses exactly this sequence: brown the steak in cast iron, then roast it in the oven.
Thick Steaks Get More Control
A thick steak can burn on the outside if you try to finish the entire cook over a very hot burner.
Moving the skillet into the oven reduces the amount of direct pan contact needed.
That is the main reason this method works so well for steaks around 1½ inches thick.
Key Takeaway: The skillet provides strong surface browning, while the oven finishes the center without requiring the steak to stay over intense burner heat for the whole cook.
Should You Butter-Baste Steak Before or After the Oven?
Butter is optional, but timing matters.
Do Not Start With Butter in a Smoking-Hot Pan
Butter contains milk proteins that darken quickly.
A skillet hot enough to sear steak can burn those solids before the steak develops its crust.
Use neutral oil for the first sear.
Add Butter Near the End of Stovetop Searing
After both sides have browned, reduce the heat slightly and add butter.
Garlic, thyme, or rosemary can go into the pan at this stage.
Tilt the skillet and baste for 20 to 60 seconds.
Food Network’s stovetop steak method also adds butter and aromatics late in cooking rather than using butter as the initial searing fat.
A Short Final Baste Also Works
Another option is to finish the steak in the oven first.
When it returns to the stovetop, add butter and herbs for a very short final baste.
Watch the internal temperature because the steak is already close to finished.
Key Takeaway: Use high-heat oil for the initial crust and save butter for the later part of cooking so its milk solids do not burn during the hottest stage.
How to Cook a 2-Inch Steak With Cast Iron and an Oven
A 2-inch steak can be cooked with the sear-first method, but reverse searing gives you more control.
Reverse-Sear Method for Extra-Thick Steak
Food Network’s reverse-sear approach uses a low-temperature oven first, followed by a very hot cast-iron sear.
The basic sequence is:
- Season the steak.
- Place it on a wire rack over a sheet pan.
- Cook in a low oven.
- Monitor internal temperature closely.
- Remove it before the final sear stage.
- Heat cast iron until very hot.
- Sear each side briefly.
- Sear the edges.
- Serve once the intended internal temperature and food-safety target are reached.
The low oven dries the exterior while bringing the center up slowly.
The final skillet contact then focuses almost entirely on crust formation.
Food Network identifies reverse searing as a strong choice for thick cuts because the slower oven stage gives more control over center temperature.
Common Cast Iron Steak Mistakes
Putting a Wet Steak in the Skillet
Surface water delays browning.
Pat the steak dry immediately before seasoning and searing.
Using a Skillet That Is Not Hot Enough
If the steak goes into a lukewarm skillet, it releases moisture before a strong crust develops.
Give the cast iron several minutes to preheat.
Crowding Two Large Steaks Into a Small Pan
A packed skillet holds extra moisture around the meat.
Use a 12-inch pan for two steaks or cook them separately if they touch.
Moving the Steak Constantly
Give the first surface time to develop color.
You can turn the steak again later if needed, but repeatedly sliding it around immediately after it reaches the skillet interferes with crust formation.
Starting With Butter
Use a higher-heat oil first.
Butter belongs later in the process.
Cooking Entirely by Minutes
A timer cannot account for thickness and starting conditions.
Use it as a reminder to check the steak, not as proof that the center has reached the temperature you want.
Forgetting the Skillet Handle Is Hot
Once cast iron enters the oven, every exposed part becomes hot.
Keep an oven mitt on the handle or place a heat-safe handle cover nearby as a visual reminder.
Resting the Steak Inside the Skillet
Cast iron stays hot for a long time.
Move the steak to another surface immediately after cooking so the bottom does not continue frying during the rest.
Conclusion
How to cook steak in a cast iron skillet and oven comes down to dividing the job between two heat sources: use the skillet to create the crust and the oven to finish the center. For a 1- to 1½-inch steak, a 425°F oven paired with a 2-minute-per-side sear is a useful starting method.
Dry the steak before it touches the pan, preheat the cast iron thoroughly, use high-heat oil, and save butter for later. Once the skillet moves into the oven, stop watching the clock alone and start checking the center with a meat thermometer.
USDA recommends that whole beef steaks reach at least 145°F before leaving the heat, followed by a minimum 3-minute rest. After cooking, move the steak out of the hot cast iron, let it rest, and slice across the grain if serving it in strips.
FAQs About Cooking Steak in Cast Iron and the Oven
What temperature should the oven be for cast iron skillet steak?
A range of about 400–450°F works well for searing steak first and finishing it in the oven. I recommend 425°F as a practical starting point. Food Network uses 450°F for one thick-steak method, while other recipes use lower temperatures, so thermometer readings matter more than one exact oven setting.
How long should steak stay in the oven after searing?
A 1½-inch steak may need roughly 3 to 7 minutes in a 425°F oven after searing, but thickness and starting temperature can shift that range. Begin checking early with a meat thermometer. A 1-inch steak may need little or no oven time after a strong sear.
Do you put oil in a cast iron skillet for steak?
Yes, a thin layer of high-heat neutral oil works well. Canola, avocado, grapeseed, or refined vegetable oil are suitable choices. Lodge uses canola oil in its cast-iron steak method. Add butter later if you want garlic-and-herb basting.
Should you sear steak before putting it in the oven?
For the skillet-to-oven method, yes. Searing first creates the browned exterior, while the oven then finishes the center. This approach is widely used for steaks around 1 to 1½ inches thick. Extra-thick steaks can also be cooked in the opposite order with a reverse sear.
Can you put a cast iron skillet directly from the stove into the oven?
Yes, a traditional all-cast-iron skillet is made for stovetop and oven cooking. Check any silicone handle cover, lid, coating, or accessory separately because those parts may have lower heat limits. Always use an oven mitt after the skillet enters the oven.
How do you keep steak from sticking to cast iron?
Preheat the skillet thoroughly, use a small amount of oil, and let the steak form a crust before trying to move it. Meat may resist at first and release more easily after browning. A properly maintained cast-iron cooking surface also reduces sticking during later use.
How do you know when steak is done without cutting it open?
Use an instant-read thermometer inserted into the thickest part. Cutting into the steak during cooking loses moisture and still gives a less precise doneness check. USDA recommends at least 145°F for whole beef steaks followed by a 3-minute rest.
Is cast iron better for thick or thin steak?
Cast iron works for both, but the skillet-and-oven method is most useful for steaks about 1 to 1½ inches thick. Very thin steaks often finish during the stovetop sear. Steaks around 2 inches or thicker may be easier to control with a reverse sear, using a low oven first and cast iron at the end.