
How to Refinish a Wood Cutting Board: Steps for a Smooth Surface
A worn wooden cutting board can usually be restored by cleaning and drying it, sanding away knife marks and rough fibers, removing the sanding dust, then treating the bare wood with food-grade mineral oil. A food-safe wax conditioner can be added after oiling for a smoother feel and extra moisture resistance.
The main challenge is removing enough wood to smooth the cutting surface without sanding away more material than necessary. Deep knife grooves, raised grain, stains, and general dryness do not all need the same starting grit.
A careful refinish can leave the board flatter, smoother, easier to clean, and less likely to absorb moisture quickly. It also gives freshly exposed wood a new oil treatment after the worn outer surface has been removed.
For how to refinish a wood cutting board, the condition of the surface should decide the starting grit. A heavily scored board may need 80 grit, while light wear or raised grain may need only 150, 180, or 220 grit. Heavily scored cutting surfaces are commonly sanded from about 80 through 180 grit.
Not every board should be saved. USDA food-safety guidance recommends replacing cutting boards once they become excessively worn or develop grooves that are difficult to clean. Deep cracks, failed glue joints, severe warping, or soft damaged wood are also reasons to consider replacement.
A good refinishing job comes down to deciding if the board is still serviceable, cleaning and drying it fully, sanding in sensible grit steps, removing dust, applying a food-contact-safe oil, and giving the wood enough time to absorb the finish before returning it to kitchen use.
What You Need to Refinish a Wood Cutting Board
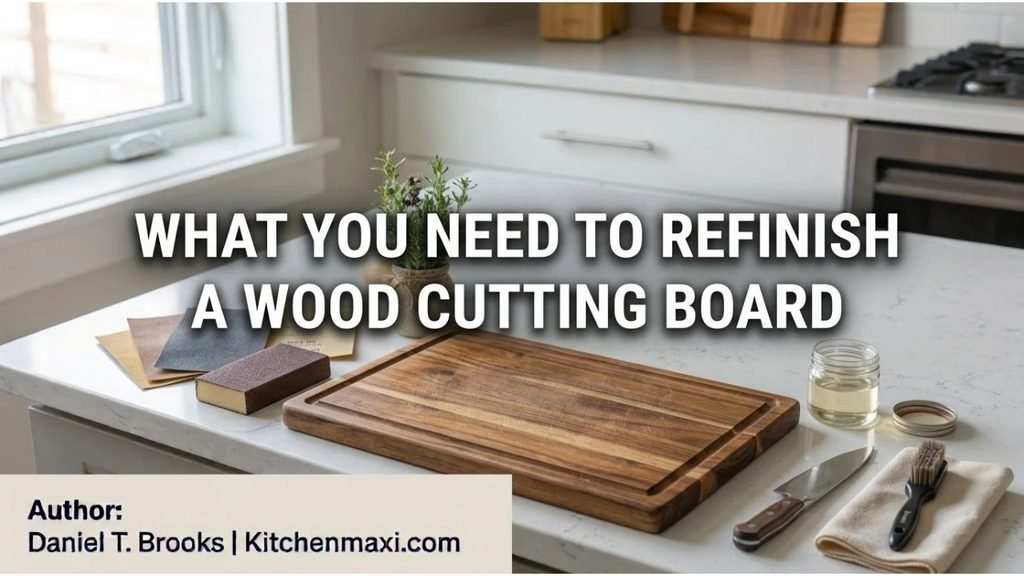
Gather these supplies before starting:
- Warm water and dish soap
- Clean sponge or cloth
- Plastic scraper, if needed
- Sandpaper in suitable grits
- Random orbital sander, optional
- Sanding block
- Vacuum or clean brush
- Lint-free cloths
- Food-grade mineral oil or cutting-board oil
- Food-safe board conditioner or wax, optional
- Eye protection
- Dust mask or suitable respiratory protection for sanding dust
For a heavily scored board, a practical abrasive sequence is 80 → 120 → 150 → 180 grit.
Moderate wear may need only 120 → 150 → 180 grit.
For light surface roughness, 180 or 220 grit may be enough.
Use fresh abrasive. A clogged disc cuts slowly and often leads to unnecessary pressure.
How to Refinish a Wood Cutting Board Step by Step
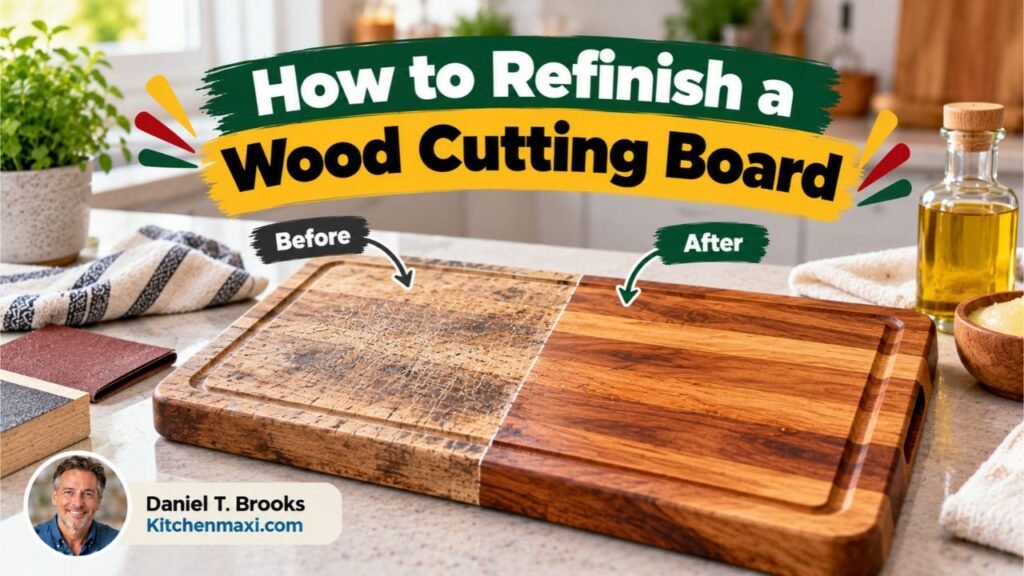
1. Check If the Cutting Board Is Still Worth Refinishing
Inspect both faces, every edge, and all glue joints.
A board is usually a reasonable candidate if the main issues are:
- Knife scratches
- Shallow grooves
- Dry-looking wood
- Light discoloration
- Raised grain
- Minor roughness
- An uneven old oil treatment
Replacement makes more sense if the board has deep structural cracks, loose laminations, severe warping, or grooves that remain difficult to clean. USDA specifically advises replacing excessively worn cutting boards and boards with hard-to-clean grooves.
Sanding can remove surface damage, but it cannot repair a failed glue joint or a deep split running through the board.
2. Wash the Board Before Sanding
Wash the cutting board with warm water and dish soap.
USDA recommends cleaning cutting boards with hot, soapy water after food preparation.
Rinse the surface and towel it dry. Do not leave a laminated board submerged in water. Long soaking can contribute to swelling, warping, and stress at glue joints.
Cleaning before sanding also keeps grease and food residue from loading the abrasive.
3. Let the Wood Dry Completely
Stand the board on edge or place it on a rack so air reaches both faces.
Do not begin heavy sanding while the wood is still damp. Moist fibers can sand unevenly and then change texture again as the board dries.
If the board looks slightly cupped after washing, let it dry and stabilize before deciding how much material needs to be removed.
4. Choose the Least Aggressive Starting Grit
Match the first grit to the damage.
For deep knife marks and widespread scoring, 80 grit is a reasonable starting point. A woodworking care source recommends starting with 80 grit and progressing to 180 grit for heavily scored cutting surfaces.
For moderate scratches, start around 120 grit.
For light wear, discoloration, or raised fibers, 150 to 220 grit may be enough. Raised grain can often be smoothed with 220 grit or finer.
I prefer starting finer when the damage is shallow because it preserves more wood.
5. Sand the Cutting Surface Evenly
A random orbital sander works well on a broad, flat cutting-board face.
Keep the entire pad flat and move in slow, overlapping passes. Do not hold the running sander over one deep knife mark while the surrounding surface remains untouched.
Spot sanding can create a hollow area.
Instead, blend the damaged section into the surrounding surface until the grooves disappear or become shallow enough that the board is easy to clean.
On edge-grain boards, finish by hand in the direction of the visible grain. For end-grain boards, use even passes across the whole face and avoid tipping the sander onto one edge.
6. Move Through Finer Sandpaper
Once the scratches from the first grit are uniform, move to the next grit.
For heavy restoration:
80 → 120 → 150 → 180
For moderate wear:
120 → 150 → 180
For a light refresh:
180 → 220
Each grit should remove the scratches left by the abrasive before it.
Skipping directly from very coarse to very fine paper can leave deep marks that become easier to see after oil darkens the grain.
Around 180 to 220 grit is smooth enough for most working cutting boards.
7. Sand the Cutting Board Edges and Corners
Inspect the edges for dents, rough fibers, dried residue, and sharp splinters.
A sanding block gives good control around edges and corners.
If the board has a juice groove, sand that area by hand. Fold sandpaper around a suitable block or shape so the groove is smoothed without being widened unevenly.
Avoid aggressively rounding corners unless that shape is intentional.
8. Remove All Sanding Dust
Vacuum or brush dust from:
- Both faces
- Edges
- Juice grooves
- Handles
- Finger slots
- Recesses
Then wipe the board with a clean cloth.
A lightly damp cloth can raise remaining fine fibers. After the surface dries, a very light pass with 220 grit can remove that fuzz before oiling. This method is also recommended for raised wood grain.
9. Apply Food-Grade Mineral Oil
Place the clean, dry board on a protected surface.
Spread food-grade mineral oil generously across the cutting face, edges, and opposite face.
Food-grade mineral oil is commonly used for cutting surfaces because it penetrates wood, is odorless, and does not become rancid like many cooking oils.
Let the wood absorb the oil.
Freshly sanded or very dry boards may take several applications. Current cutting-board oil directions recommend at least two coats on raw wood, with each coat given at least an hour to soak in. Thick butcher-block surfaces may need three or four coats.
Wipe away excess oil once the wood stops absorbing it readily.
10. Add a Food-Safe Cutting Board Conditioner
A wax-based conditioner is optional after the mineral oil.
Products made from food-grade mineral oil with beeswax or carnauba wax stay closer to the surface and add some resistance to short periods of water contact.
Apply a thin coat, let it sit for the time stated on the product, then buff away the excess with a clean cloth.
Do not substitute a generic furniture wax. Use a conditioner specifically labeled for food-contact cutting surfaces.
Key Takeaway: Clean and dry the board first, sand only as aggressively as the damage requires, finish around 180–220 grit, remove the dust, then treat the exposed wood with food-grade mineral oil and an optional food-safe wax conditioner.
How to Choose Sandpaper Grit for a Wood Cutting Board
Deep Knife Grooves and Heavy Scoring
Start around 80 grit if the cutting surface has widespread deep knife tracks and needs actual leveling.
Sand broadly across the face instead of concentrating on individual grooves.
Once the surface is level, move through 120, 150, and 180 grit. An 80-to-180 progression is recommended for heavily scored cutting surfaces.
Moderate Cutting Board Scratches and Stains
Start around 120 or 150 grit.
This range often works for a board that looks worn but does not have deep channels.
If a discoloration remains after the surrounding surface is already smooth, avoid grinding farther into the board solely to remove a cosmetic mark.
Light Roughness or Raised Wood Grain
Use 180 to 220 grit.
A final 220-grit pass is also useful after a damp wipe raises tiny remaining fibers.
Key Takeaway: Use 80 grit for real leveling, 120–150 grit for moderate wear, and 180–220 grit for light refinishing and final smoothing.
Should You Refinish Both Sides of a Wood Cutting Board?
You do not always need to remove the same amount of material from both sides.
If only one face has heavy knife wear, most corrective sanding can stay on that face. Still inspect the opposite side for rough fibers, cracks, stains, and loose glue joints.
After sanding, oil both faces and the edges.
Applying oil to all sides gives the wood more even moisture protection, and current board-conditioner directions also call for application across all sides of an untreated board.
If both sides are used as cutting surfaces, refinish both to a similar standard.
What Finish Should You Use on a Refinished Cutting Board?
Food-Grade Mineral Oil
Food-grade mineral oil is one of the simplest treatments for a working cutting board.
It penetrates the wood instead of creating a hard film over the knife surface and does not become rancid like ordinary cooking oils.
Make sure the product is identified as suitable for cutting boards or food-contact wood surfaces.
Mineral Oil and Beeswax Conditioner
A board conditioner combines penetrating mineral oil with wax that remains nearer the surface.
It can give the wood:
- A smoother feel
- A light sheen
- More resistance to brief moisture exposure
Use it after the freshly sanded board has absorbed enough mineral oil.
Finishes to Avoid on a Working Cutting Board
Avoid finishes that are not identified for direct food-contact cutting surfaces.
Examples include many:
- Furniture polishes
- Decorative wood stains
- Generic waxes
- Unknown oil-and-varnish mixtures
- Cabinet finishes
Ordinary cooking oils such as olive or vegetable oil are also poor choices because they can oxidize and become rancid. Major cutting-board care guidance specifically warns against using cooking oil on wood cutting boards.
Key Takeaway: Food-grade mineral oil is a simple treatment for freshly sanded cutting-board wood, while an approved mineral-oil-and-wax conditioner can be added afterward.
How to Remove Stains While Refinishing a Wood Cutting Board
Many shallow stains become lighter during normal surface sanding.
Sand the cutting face evenly first instead of attacking the stain as an isolated spot.
For stubborn discoloration, fine sanding around 200 grit can expose fresh wood, followed by a new oil and conditioner treatment.
Do not create a depression just to remove the last trace of color. Some stains penetrate farther into the grain than the amount of wood that should reasonably be removed.
A mark accompanied by a persistent odor, crack, soft area, or hard-to-clean groove deserves more attention than harmless cosmetic discoloration.
How to Handle Deep Knife Marks and Cutting Board Grooves
Shallow and moderate knife grooves can often be removed by leveling the whole cutting face.
Deep isolated cuts require more judgment.
If removing one groove would mean sanding a large amount from the entire board, stopping with a faint visible mark may be preferable to thinning or distorting the board.
The food-safety concern is cleanability. USDA recommends replacement once wear or grooves become difficult to clean properly.
I’d stop sanding once the face is smooth enough to wash thoroughly rather than chasing every visual mark.
Can You Use an Orbital Sander to Refinish a Cutting Board?
Yes. A random orbital sander works well on flat cutting-board faces and saves time on boards with extensive knife marks.
Use it with:
- A flat pad
- Light pressure
- Slow overlapping passes
- Fresh abrasive
- A securely supported board
Do not linger over individual scratches or tilt the pad onto an edge.
A woodworking care recommendation specifically calls for a random-orbit sander on heavily scored cutting boards, beginning around 80 grit and progressing to 180 grit.
For very light surface wear, hand sanding may be quicker and gives more control.
How Often Should You Refinish a Wood Cutting Board?
Full sanding is not routine maintenance.
Refinish only when washing and normal oiling no longer address problems such as:
- Heavy knife scoring
- Rough raised grain
- Persistent shallow stains
- Uneven cutting surfaces
- Surface damage that interferes with cleaning
Oiling should happen more often than sanding.
A useful sign is dry, pale-looking wood. Major cutting-board care guidance recommends reapplying oil once the board becomes dry and lighter in color.
A board may need many oil treatments before it ever needs another full sanding.
Common Wood Cutting Board Refinishing Mistakes
Starting With Sandpaper That Is Too Coarse
Using 40 or 60 grit on a board with light scratches removes far more wood than needed.
Begin with the least aggressive grit that can remove the damage at a reasonable pace.
Sanding Only the Deep Knife Marks
Concentrating the sander over grooves creates dips.
Blend the entire surrounding face instead.
Using Cooking Oil on the Board
Olive, canola, and similar cooking oils are not substitutes for stable food-grade mineral oil. Cutting-board care instructions warn that cooking oil can age poorly and damage the board.
Applying Oil Before the Board Is Dry
Let moisture from washing leave the wood before applying the new oil treatment.
A dry board also makes it easier to judge how evenly the fresh mineral oil is being absorbed.
Ignoring the Edges and Opposite Face
Oil both faces and the edges rather than treating only the visible cutting surface.
Trying to Save a Badly Damaged Board
Sanding does not repair deep structural cracks, failed laminations, severe warping, or contaminated grooves.
USDA guidance favors replacement once wear makes a board difficult to clean.
Key Takeaway: Avoid unnecessarily coarse sanding, spot-sanding deep grooves, cooking oils, oiling damp wood, and attempts to save boards that are no longer structurally sound or easy to clean.
How to Care for a Wood Cutting Board After Refinishing
Wash the board with warm, soapy water after food preparation, rinse it, and dry it promptly. USDA recommends washing cutting boards and other food-contact surfaces with hot, soapy water between food-preparation tasks.
Avoid leaving a laminated wood board submerged in water.
Reapply food-grade mineral oil or an approved cutting-board conditioner when the wood begins to look or feel dry. Current cutting-board oil guidance recommends refreshing the surface when dryness becomes apparent.
Using a separate cutting board for fresh produce and another for raw meat, poultry, and seafood is also recommended by USDA where practical.
Conclusion
How to refinish a wood cutting board starts with deciding if the board is still sound enough to restore. Knife marks, raised fibers, dryness, and shallow discoloration can often be corrected with washing, controlled sanding, and fresh food-grade mineral oil.
Use 80 grit only for a heavily scored surface. Start around 120–150 grit for moderate wear and 180–220 grit for a light refresh, moving through finer grits until the cutting face feels smooth.
Finish by treating both faces and the edges with food-grade mineral oil, followed by an approved wax conditioner if desired. Replace the board instead of repeatedly sanding it if deep cracks, failed glue joints, excessive wear, or hard-to-clean grooves remain.
FAQs About Refinishing a Wood Cutting Board
What grit sandpaper should I use to refinish a cutting board?
Use 80 grit for a heavily scored surface, followed by 120, 150, and 180 grit. Moderate wear can often start around 120 or 150 grit, while a light refresh may require only 180 or 220. An 80-to-180 progression is recommended for heavily scored cutting surfaces.
Can you sand a wooden cutting board and use it again?
Yes. Sanding can restore a board with ordinary knife marks, rough grain, shallow grooves, or light stains. Remove all sanding dust afterward and treat the bare wood with food-grade mineral oil. Replace the board if it is badly cracked, excessively worn, or still has grooves that cannot be cleaned well.
Should I wet a cutting board before sanding?
Wash it first and let it dry before the main sanding process. After the board is smooth, a light damp wipe can intentionally raise remaining fine fibers. Let those fibers dry, then sand very lightly with about 220 grit before oiling.
What oil should I use after sanding a wood cutting board?
Use food-grade mineral oil or a cutting-board oil specifically identified for food-contact surfaces. Mineral oil penetrates the wood and does not become rancid like ordinary cooking oils. A food-safe mineral-oil-and-wax conditioner can be applied after the initial oil treatment.
How many coats of mineral oil does a refinished cutting board need?
Freshly sanded wood often takes more than one application. Current cutting-board oil directions recommend at least two coats on raw wood, with each coat given at least an hour to absorb. Thick butcher-block surfaces may take three or four coats. Wipe away oil that remains after the wood stops absorbing it readily.
Can I use olive oil to refinish a cutting board?
No. Olive oil and many other cooking oils can oxidize and become rancid. Use food-grade mineral oil or a purpose-made cutting-board oil instead. Established wood cutting-board care instructions specifically warn against using ordinary cooking oil for this job.
Can a cracked wood cutting board be refinished?
Surface scratches can be sanded away, but structural cracks are different. A deep split can hold moisture and food residue below the visible surface, and sanding does not repair a failed glue joint. If the crack stays open, extends deeply into the board, or creates an area that cannot be cleaned thoroughly, replacing the cutting board is the safer choice.