


There is a very specific type of panic that happens when you open your freezer and find that the ice cream is soft. I’ve been there before. A few years ago, my reliable kitchen fridge started making a loud noise, but the temperature inside kept rising. I thought that the door seal was broken or that the coils were dirty. I spent hours cleaning and fixing things, only to find out days later (and £100 worth of spoiled food later) that I had a slow gas leak.
I would have saved myself days of guessing and checking if I had a detector back then. When I used one for the first time, I realized that fridges are not magic boxes; they are just plumbing loops. You don’t have to be a mechanic to know how to check them, but it does give you the confidence to know if you need to fix or replace them.
What is a Refrigerant Leak Detector?
When your fridge or freezer stops keeping things cool, the problem is often hidden. A refrigerant leak detector is a special tool that can find the gases that keep your appliances cool. These gases, which are often called refrigerants, move through the coils in your fridge. If there is a crack or a loose connection, the gas leaks out, and your appliance has to work extra hard to make up for it.
A handheld refrigerant leak detector may sound like something only professionals use, but it’s actually very easy for the average homeowner to get their hands on. It helps you figure out if a leak is what caused your warm milk or soft frozen peas, so you don’t have to pay a technician to find out what’s wrong.
Why You Need to Catch Leaks Early
Refrigerants are not just air; they are chemicals that move heat. When they leak, two things happen: the compressor runs all the time, which raises your energy bill, and your food is no longer safe.
But there are also safety and environmental issues to think about, in addition to the annoying things that happen in the kitchen. Older fridges use refrigerants that hurt the ozone layer. Newer eco-friendly fridges often use R600a (Isobutane), which is very effective but also flammable. Not paying attention to a hissing sound or a chemical smell can be dangerous in a small kitchen, not just bad for your electricity meter.
If you find a leak early, you can decide whether to fix the fridge or recycle it and buy a new one.
Types of Refrigerant Leak Detectors
Different detectors work in different ways. You have three main choices based on how much money you have and how often you want to play “kitchen detective.”
Electronic Detectors (The Sniffers)
These are the tools that people use at home the most. They look like a small box that you can hold in your hand with a long, bendable probe (often called a “goose-neck”). You turn it on, let it warm up, and then run the tip along the pipes that hold the refrigerant. It beeps quickly or lights up if it finds gas.
- Best for: Finding the exact spot where a leak is.
- KitchenMaxi Verdict: For most homeowners, this is the best investment. It’s clean, exact, and can be used again.
UV Dye Detection
This way of doing things is a little like CSI. You put a fluorescent dye into the refrigeration system and let it flow. After that, you use a UV light to look at the pipes. The leak will shine brightly.
- Best for: Very small leaks that electronic sniffers might not pick up on.
- KitchenMaxi Verdict: It’s messy and you have to open the system to add the dye, which isn’t something most DIY cooks should do.
The Soap Bubble Method
The “old school” way. You mix water and dish soap (or buy a special leak detection fluid) and put it on the pipe joints. It will blow bubbles if gas is leaking.
- Best for: Large, obvious leaks.
- KitchenMaxi Verdict: It’s almost free, but it won’t find small, slow leaks. It’s a good start, but don’t depend on it completely.
How to Choose the Right Tool
Don’t just grab the cheapest refrigerant leak detector when you’re shopping for one. This is what matters for a kitchen at home:
- Sensitivity: You need a device that can pick up on amounts of gas, which are usually measured in grams per year. If it isn’t sensitive enough, it will only beep when there are huge leaks that you could probably hear hissing anyway.
- Gas compatibility is very important. You can find out what kind of refrigerant your fridge uses (like R134a, R600a, or R290) by looking in the manual or on the sticker inside the door. Make sure the detector is made for that gas.
- Sensor Life: The ends of electronic detectors wear out over time. You don’t want to have to throw away the whole unit after a few years, so look for one with a sensor tip that can be replaced.
- Audio Mute: Trust me, being able to turn off the beeping and rely on LED lights is a blessing if you are working late at night and don’t want to wake the house.
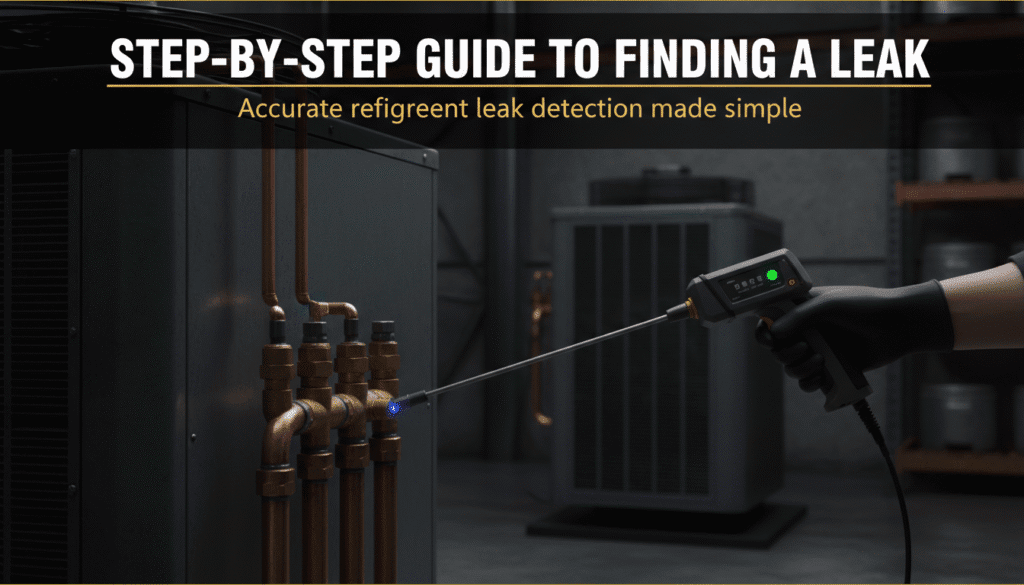
Step-by-Step Guide to Finding a Leak
Using a refrigerant leak detector isn’t difficult, but it requires patience. You can’t just wave it around the room like a magic wand.
1. Prepare the Kitchen
Turn off any fans, close the windows, and do your best to stop the air from moving. Refrigerant gas is often heavier than air, but drafts will blow it away before your detector can smell it. Unplugging the fridge is the best way to stop the fan noise and compressor vibration.
2. Locate the Components
Take the fridge away from the wall. You need to find the compressor (the black tank at the bottom back), the condenser coils (the grid on the back or bottom), and the copper tubing that connects them.
3. Power Up and Calibrate
In the open air, away from the fridge, turn on your detector. Let it warm up and adjust to the air around it. If you turn it on right next to a leak, it might “zero out” on the gas and not find the leak source..
4. The “Painting” Technique
Move the tip of the probe slowly, about 2 to 3 centimeters per second. Try not to touch the pipes with the tip, but keep it very close to them. Oil or dirt can get on the sensor and make it less accurate. Picture yourself carefully spraying paint on the pipe.
5. Check the Joints
There aren’t many leaks in the middle of a straight pipe. They happen most of the time at the service valves or at the joints where pipes are brazed together. These joints crack over time because of vibrations that aren’t expected. Put your energy there.
6. Verify
If the machine beeps, take it outside to get some fresh air and then go back to where you were. If it beeps again in the same place, you’ve found the problem.
Safety and Best Practices
I cannot stress this enough: Ventilation is key.
You are basically dealing with lighter fluid if your fridge uses R600a (Isobutane). Even though the amount in a fridge is small, you should never use a flame or make sparks near a suspected leak..
- Don’t breathe it in; refrigerants can take the place of oxygen. Don’t let the leak get on your face.
- Chemical interference: Strong household cleaners or solvents can sometimes cause electronic detectors to go off. If you’ve just bleached the floor behind the fridge, make sure to let it air out before you test.
- Know what you can and can’t do: The DIY part is finding the leak. Brazing torches, vacuum pumps, and recharging gas by weight are all things that are usually needed to fix a leak. It is against the law to handle refrigerant gas in the UK and many other places. Use the detector to find the problem, then call a pro to fix it.
Maintenance: Keep Your Sniffer Sniffing
These tools are sensitive precision instruments, not hammers. If you want yours to last:
- Clean the sensor: Don’t ever put the tip in oil or sludge. It’s all over if the sensor gets dirty.
- Take out the batteries: If you only use it once a year, take the batteries out. Because they sit in drawers for months, leak detectors are known to have batteries that corrode.
- Check the filter: Most probes have a small foam filter that keeps dust from getting to the sensor. Check to see if there is any dust or grease in it.

Pros & Cons of Owning a Detector
Is it worth adding this gadget to your kitchen toolkit? Here is the breakdown.
| Pros | Cons |
|---|---|
| Saves Diagnostic Fees: You know the problem before calling a pro. | False Alarms: chemicals and moisture can trigger false beeps. |
| Peace of Mind: Stops you guessing if the fridge is broken or just dirty. | Maintenance: Sensors degrade over time (usually 20-50 hours of use). |
| Safety: Helps you identify flammable gas leaks in modern fridges. | Does Not Fix It: Finding the leak is only half the battle. |
| Versatile: Can often be used on car AC and home air conditioners too. | Learning Curve: Requires a steady hand and patience to use correctly. |
KitchenMaxi Rating: 4.5/5
A refrigerant leak detector is a 4.5/5 tool for a certain group of home cooks: those who like to keep their own tools in good shape or take care of older appliances. It only gets half a point because it’s a “diagnostic only” tool that doesn’t fix the problem for you. But it pays for itself after just one use because it saves you money by keeping you from having to call for service more than once.
Conclusion
It’s bad enough that your fridge is warm; not knowing why it’s warm is even worse. A refrigerant leak detector takes the guesswork out of the equation. It tells you right away if your appliance has stopped working or if the problem is somewhere else.
It won’t take the place of a professional repairman, but it does give you back control. You can choose whether to buy a new unit or fix the old one, which will get your kitchen back to normal and keep your ice cream frozen as soon as possible.
FAQ:
How can you detect a refrigerant leak?
An electronic leak detector is the best way for someone who lives in a home to find leaks. You move the probe along the pipes in the fridge, and it beeps when it finds gas. You can also look for oil on pipes (gas leaks often carry oil) or use the soapy water bubble test on the joints of the pipes.
What is a refrigerant leak detector?
It is a portable electronic device with a sensor that can detect halogens or hydrocarbons. It “sniffs” the air for certain chemicals that are used in cooling systems. When it finds gas, it alerts the user with a sound or visual signal.
How to Use a Refrigerant Leak Detector
To stop the air from moving, turn off the fans first. To calibrate the device, turn it on in the open air. Move the probe tip slowly along the refrigeration lines, paying special attention to the joints and valves. Move slowly (about 2 cm per second) and keep the tip close to the pipe, but don’t touch it.
What refrigerant can be used for leak detection?
You don’t need to use refrigerant to find leaks; the detector finds the refrigerant that is already in your system. Most regular electronic detectors, on the other hand, are made to find HFCs (like R134a), CFCs, and HCFCs. Make sure your specific detector can handle hydrocarbon gases if your modern fridge has R600a (Isobutane).