
How to Use Manual Food Chopper Units for Fast, Even Cuts
Operating a hand-powered kitchen dicer requires seating the stainless steel blade assembly onto the center pin, filling the bowl halfway with pre-cut 1-inch vegetable chunks, locking the lid, and pulling the cord horizontally or pressing the lever firmly downward. Three to five strokes create a coarse chop, while ten to twelve actuations produce a fine mince.
Stuffing a whole onion into the bowl or yanking a pull string upward at a sharp angle stalls the rotor, frays the nylon cord, and leaves huge uncut chunks floating in watery puree. Forcing fibrous celery stalks or rock-hard raw sweet potatoes through a light-duty blade grid can even bend the metal inserts or snap the plastic drive gear on the first meal.
Following the proper loading order and stroke count turns tedious prep into a ten-second task. You get uniform cubes that cook evenly in the skillet, zero onion tears, and complete control over texture without dragging a heavy electric food processor out of the cabinet.
Cutting down prep time and keeping fingers away from exposed knife edges matters in busy kitchens. According to U.S. Bureau of Labor Statistics American Time Use Survey data, Americans who cook at home spend an average of 64 minutes per day on meal preparation and kitchen cleanup.
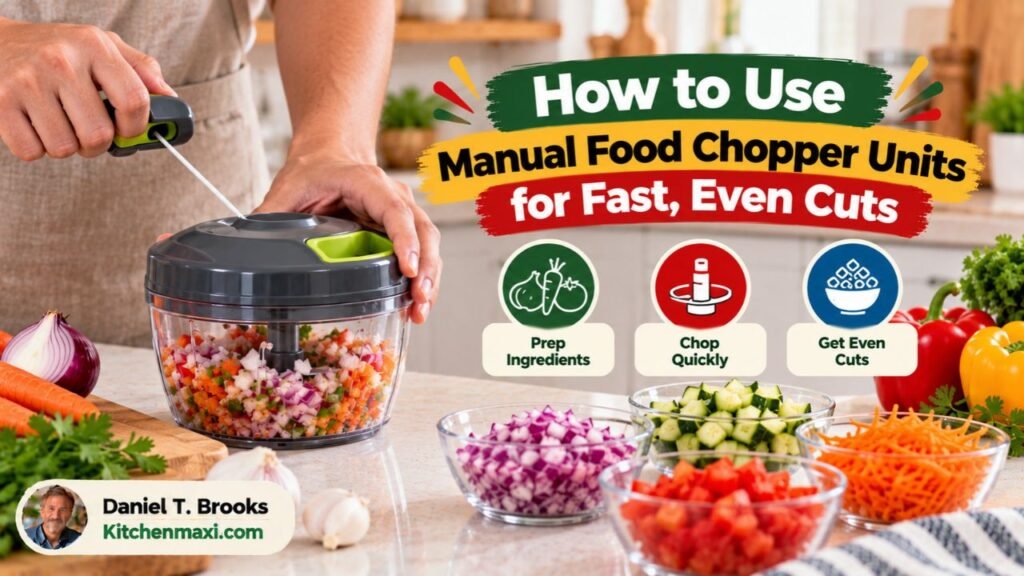
Meanwhile, U.S. Consumer Product Safety Commission figures show unpowered kitchen knives are involved in roughly 345,000 emergency department visits each year. Knowing how to use manual food chopper mechanisms properly trims daily prep time while keeping sharp steel completely enclosed inside a protective polycarbonate bowl.
In my research across manufacturer operating manuals, I noticed that nearly every broken pull cord or jammed lid traces back to placing the food into the cup before dropping in the central blade post. Below, I cover how to identify your specific chopper mechanism, pre-cut ingredients to the ideal size, operate pull-cord, plunger, and lever-grid models step by step, control texture by stroke count, and avoid common jamming mistakes.
Main Types of Manual Food Chopper Mechanisms and How Each One Works
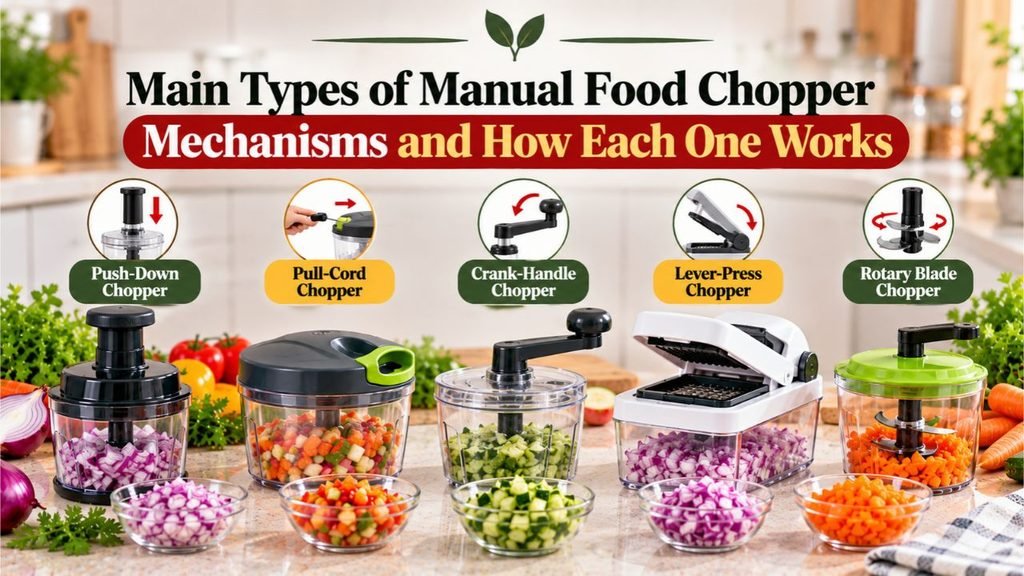
Before loading your ingredients, take a look at how your specific gadget transfers hand force to the blades. In my review of popular kitchenware designs, almost every non-electric chopper falls into one of four mechanical styles, and each one demands a slightly different hand motion.
Pull-Cord String Food Choppers
A pull-cord chopper uses a round clear bowl, a central spindle holding two or three curved stainless steel blades in a staggered stack, and a lid containing a spring-loaded recoil reel. Pulling the nylon cord spins the center shaft at high speed, sweeping the curved blades horizontally through garlic, herbs, onions, or cooked meats.
Plunger Slap Food Choppers
A plunger-style chopper features a tall cylindrical housing with a spring-loaded top knob and a W-shaped angled blade at the bottom. Pressing or slapping the top plunger pushes the blade straight down into the food on a cutting board or inside an attached base cup; as the spring rebounds, an internal ratchet rotates the blade roughly 30 degrees so the next strike hits a fresh angle.
Lever-Press Grid Food Choppers (Alligator and Box Dicers)
A hinged lever or box dicer relies on a stationary square grid of intersecting razor blades mounted over a rectangular catch bin. Instead of spinning, a top lid fitted with a matching square plastic pusher plate forces slices of onion, tomato, or bell pepper straight down through the steel mesh in a single motion to produce uniform cubes or french-fry batons.
Hand-Crank Gear Food Choppers
A hand-crank chopper replaces the pull string with a top or side rotary handle connected to internal nylon bevel gears. Turning the crank clockwise spins the blade post or shredding disc continuously, giving you steady torque for heavier mixtures like salsa, chickpea salad, or breadcrumbs.
| Manual Chopper Type | Driving Action | Best Food Output | Typical Capacity |
| Pull-Cord Chopper | Horizontal string pull | Minced garlic, salsas, herbs, nuts, purees | 1.5 to 4 cups |
| Plunger Slap Chopper | Vertical palm press | Quick-chopped nuts, shallots, hard-boiled eggs | 0.5 to 1.5 cups |
| Lever-Grid Box Dicer | Two-handed downward lid push | Exact 1/4-inch or 1/2-inch vegetable cubes | 2 to 4 cups |
| Hand-Crank Chopper | Rotary handle turn | Coarse salads, ground biscuits, thick dips | 3 to 5 cups |
Key Takeaway: Identify whether your manual food chopper uses a spinning blade shaft (pull-cord and hand-crank), a ratcheting vertical blade (plunger style), or a stationary dicing mesh (lever-grid dicer) so you apply force in the direction the mechanism was built to handle.
How to Prepare Ingredients Before Using a Manual Food Chopper

Dropping whole, unpeeled produce straight into a compact chopper is the fastest way to stall the blades. Even the sharpest stainless steel rotor needs a tiny fraction of a second to build momentum before hitting dense vegetable fibers.
Pre-Cutting Produce to the Right Size
Cut large vegetables into 1-inch to 1.5-inch chunks before placing them in a pull-cord, plunger, or hand-crank bowl. Quarter small onions, halve medium tomatoes, and slice carrots into short coins.
If you are using a rectangular lever-grid vegetable dicer, slice rounded foods like potatoes, onions, and cucumbers into flat slabs roughly 1/2-inch to 3/4-inch thick so they sit completely flat on the metal grid without exceeding the height of the blade frame.
Peeling, Seeding, and Removing Tough Cores
Remove papery outer skins from onions, shallots, and garlic cloves, as dry skins wrap tightly around spinning blade shafts and jam between plastic pusher teeth. Cut out the woody root core at the base of onions and cabbage wedges, remove hard pits from olives, cherries, or avocados, and strip tough woody stems off rosemary or kale before loading the container.
Respecting the Maximum Fill Line
Fill a spinning-blade manual food chopper no more than one-half to two-thirds full. Leaving open headspace at the top of the bowl allows chopped pieces to tumble upward and fall back down into the path of the lower blades. Overpacking the cup pins the top pieces against the underside of the lid while turning the bottom layer into watery mush.
Tip: When chopping leafy herbs like parsley, cilantro, or basil in a pull-cord chopper, spin or pat the leaves bone-dry with a paper towel first. Wet leaves stick flat against the plastic walls instead of circulating across the blades.
Key Takeaway: Trim away tough cores and papery skins, cut produce into 1-inch chunks or flat slabs, and cap your batch size at half to two-thirds of the bowl capacity so ingredients can move freely across the blades.
How to Use Manual Food Chopper Models Step by Step

While every brand has minor cosmetic differences, following the right assembly and stroke technique for your specific style protects the gears and delivers uniform pieces on the first try.
Safety Tip: Always grip the blade post by its textured top plastic stem and keep your fingers completely clear of the curved metal edges. Never leave the blade cartridge loose on the counter where a hand can brush against it.
Using a Pull-Cord or Hand-Crank Food Chopper
From the manufacturer service sheets I reviewed, installing the blade before adding food is the single most critical step for rotary choppers:
- Stabilize the base: Place the clear chopper bowl on a flat, dry countertop or damp dish towel so the non-slip silicone base ring grips the surface.
- Seat the blade assembly first: Hold the central blade column by its upper plastic grip and lower it straight onto the metal or plastic guide pin in the center of the empty bowl. Confirm it sits completely level and spins freely.
- Load your pre-cut food: Arrange your 1-inch food pieces evenly around the blade post without piling them higher than the top blade.
- Lock the lid onto the bowl: Lower the lid so the hexagonal or slotted drive socket on the underside slips onto the top of the blade post, then twist the lid clockwise until the locking tabs click into the bowl rim.
- Hold the lid steady and pull horizontally: Place your non-dominant palm firmly on top of the lid to anchor the unit against the counter. With your dominant hand, pull the cord handle straight out horizontally in smooth, controlled strokes about 12 to 15 inches long—or turn the hand crank at a steady pace. Let the string retract almost all the way back into the housing between pulls without letting the handle snap violently against the plastic eyelet.
Using a Plunger-Style Slap Chopper
Plunger choppers work best on small batches of garlic, nuts, shallots, or boiled eggs:
- Position the food in the center: Place a small handful of pre-cut pieces inside the bottom cup or directly on a wooden cutting board, and set the open cylindrical housing directly over the pile.
- Press the plunger straight down: Use the heel of your palm to push the spring-loaded top knob all the way down until the W-blade contacts the base, then release your hand immediately so the spring snaps the blade back to the top.
- Repeat with rhythmic vertical strikes: Continue pressing and releasing 5 to 15 times. Watch through the clear lower sleeve as the internal wiper strips food off the blade and rotates the cutting edge on every upstroke.
Using a Lever-Style Grid Vegetable Chopper
Box dicers require a brisk, decisive downward press rather than slow squeezing:
- Snap the desired blade grid into the collar: Seat the small-dice or large-dice stainless steel grid flat inside the upper frame with the sharp beveled edges facing up, and verify the silicone pusher grid is locked into the top lid.
- Place the food flat Side down: Set a flat-bottomed onion half or 1/2-inch potato slab in the center of the metal blade mesh. Keep the piece entirely inside the perimeter of the metal frame so the edges do not overlap onto the plastic border.
- Press the lid down in one firm motion: Place both hands on the soft grip pad at the front of the lid and push straight down briskly using your upper body weight. A quick, firm follow-through drives the pusher teeth cleanly through the stainless steel grid and drops the diced cubes into the catch container below.
Key Takeaway: Always drop the blade onto the center pin before adding food to a rotary bowl, pull strings straight out horizontally rather than upward, and use a brisk two-handed downward press on hinged grid dicers.
Controlling Food Texture and Chop Size in a Manual Chopper
One of the biggest advantages of operating a hand-powered chopper instead of an electric blender is that the blades stop the exact instant your hand stops moving. You never accidentally turn chunky pico de gallo into pink soup if you count your strokes.
Pull-Count and Stroke Guide for Rotary Choppers
In my research comparing standard 3-blade pull-cord and crank choppers, each full pull of the string spins the internal blade shaft roughly six to eight complete revolutions. Use these stroke ranges as your baseline:
- 3 to 5 pulls (Coarse Chop): Produces 1/4-inch to 3/8-inch pieces ideal for chunky garden salsas, mirepoix for stews, diced apples, and coarse walnut toppings.
- 6 to 9 pulls (Medium Dice / Fine Chop): Creates uniform 1/8-inch bits suited for taco onion toppings, dumpling fillings, bruschetta, and tuna or chicken salad mix-ins.
- 10 to 15 pulls (Fine Mince): Reduces garlic, ginger, shallots, chili peppers, and fresh herbs into tiny aromatic granules for stir-fry bases, marinades, and chimichurri.
- 18 to 25+ pulls (Puree and Emulsion): Blends cooked chickpeas, ripe avocados, steamed baby food vegetables, or roasted tomatoes into smooth dips, guacamole, and sauces.
Layering Hard and Soft Ingredients in the Same Batch
Have you ever tried chopping raw carrots, onions, and soft Roma tomatoes together at the same time, only to end up with bruised tomato juice and barely nicked carrot chunks? Soft, high-moisture produce breaks down in three pulls, whereas dense root vegetables require ten or more.
When building a multi-ingredient recipe like salsa or soffritto inside a pull-cord or plunger chopper, process the hardest ingredients first. Give your carrots, celery, garlic, and firm onions 5 to 6 pulls on their own. Once they are broken down to medium pieces, open the lid, drop in your quartered tomatoes, jalapeños, and fresh cilantro leaves, and give the combined batch just 3 final pulls to finish chopping and mix everything together.
| Ingredient Type | Recommended Pre-Cut Size | Target Pulls / Presses | Best Chopper Style |
| Firm Onions & Shallots | Quartered or 1/2-inch slabs | 5–8 pulls (or 1 lid press) | Pull-cord or Lever-grid |
| Garlic & Fresh Ginger | Peeled whole cloves / 1/2-inch coins | 10–12 pulls or presses | Pull-cord or Plunger slap |
| Ripe Tomatoes | Cored and quartered | 3–5 pulls (or 1 lid press) | Pull-cord or Lever-grid |
| Raw Carrots & Celery | 1-inch chunks or thin coins | 8–12 pulls (or 1 lid press) | Pull-cord or Lever-grid |
| Almonds, Walnuts & Pecans | Shelled whole or halved nuts | 6–10 pulls or presses | Plunger slap or Pull-cord |
| Leafy Herbs (Dry) | Rough handful, thick stems removed | 8–10 quick pulls | Pull-cord chopper |
Key Takeaway: Control your final consistency by counting 3 to 5 pulls for coarse chunks, 6 to 9 for a medium dice, and 10 to 15 for a fine mince, always chopping dense vegetables for several strokes before adding soft tomatoes or herbs.
Foods to Avoid Putting Inside a Manual Food Chopper
Although manual food choppers handle everyday vegetables, fruits, nuts, cooked meats, and herbs effortlessly, certain dense or sticky items can dull the blades or shear the internal plastic drive pins. Keep these foods out of a standard hand chopper:
- Ice cubes and rock-hard frozen fruit: Solid ice and unthawed frozen berries chip thin stainless steel blade edges and crack clear styrene bowls. Let frozen fruit thaw slightly for 10 minutes before pulsing.
- Whole hard spices and coffee beans: Nutmeg, cinnamon sticks, black peppercorns, and roasted coffee beans require a dedicated burr or high-RPM spice grinder.
- Uncooked bone-in meat or fibrous raw sinew: While small batches of trimmed, chilled boneless chicken breast or cooked meat chop well in a heavy-duty pull or crank processor, raw gristle wraps tightly around the blade spindle and stalls the mechanism.
- Uncooked whole winter squash and large raw sweet potatoes (on grid dicers): Pressing a thick slab of raw butternut squash or dense sweet potato onto a fine 1/4-inch dicing grid requires excessive force that can bow the metal mesh out of its plastic frame. Parboil or microwave dense squash for two minutes to take the raw edge off first.
Troubleshooting Common Manual Food Chopper Problems
Even when you follow good prep habits, a blade will occasionally lock up on a wedged piece of onion or leave a few big chunks clinging to the lid. Knowing how to clear a jam without forcing the handle saves the mechanism from damage.
What to Do When the Pull Cord or Plunger Jams on the First Stroke
Never yank harder on a stuck pull string or slam your full weight onto a stalled plunger. If the cord refuses to pull out on the first stroke, a chunk of food is wedged between the blade tip and the side wall of the bowl.
Release the cord completely, set the bowl down, twist off the lid, and give the closed bowl a quick sideways shake or stir the chunks with a spoon to free the blade path. Instead of starting with a slow, hesitant tug, begin with a short, crisp horizontal pull so the top blade slices through the first piece rather than pushing it sideways. If the bowl still resists, remove two or three chunks of produce to give the blades breathing room.
Fixing Uneven Chopping Where Food Sticks to the Upper Walls
When finely minced garlic or onion clings to the upper plastic rim while larger pieces sit uncut near the bottom, pause halfway through your pull count. Tap the base of the bowl gently against your palm or countertop to knock the upper pieces back down into the blade zone, or swipe down the inside wall with a silicone spatula before doing two final pulls.
Preventing Watery Onion or Tomato Mush
If your chopped onions look bruised and swim in cloudy juice, one of three things is happening: you pulled the cord too many times, you packed the bowl above the two-thirds mark, or the stainless steel blades have dulled or been installed upside down (on reversible shafts). Cut your stroke count down to 4 or 5 pulls, work in two smaller half-batches, and pulse with short, crisp pulls rather than rapid-fire yanking.
Pro Tip: If the nylon string on a pull-cord lid gets wet during cleanup and fails to retract smoothly, pull the string out about 12 inches, prop the handle over the side of the lid so the wet cord stays exposed to the air, and let it dry completely for an hour before letting it rewind into the spring reel.
Key Takeaway: Clear a jammed blade immediately by shaking the bowl or removing a few overcrowded chunks rather than pulling harder on the cord, and prevent watery produce by working in half-full batches with fewer strokes.
Quick Post-Use Care to Keep Your Manual Food Chopper Working Smoothly
How you handle your manual food chopper during the first sixty seconds after meal prep determines how long the spring reel, hinge pins, and cutting edges last.
- Remove the blade post before emptying the bowl: Twist off the lid, grip the center blade column by its upper plastic stem, and lift it straight out of the bowl before scooping out your diced vegetables. Trying to scrape salsa around a live blade inside the cup risks both cut fingers and nicked spatula edges.
- Rinse the blade and grid under tap water immediately: Hold the blade post—or the disassembled pusher grid and steel mesh from a lever dicer—under running lukewarm water right away so starchy potato juice and sticky garlic film do not dry onto the metal.
- Never submerge a pull-cord lid in dishwater: While the clear bowl and stainless steel blade shaft can be washed in warm soapy water with a long-handled nylon brush, the top lid of a pull-cord chopper houses a metal recoil spring and fabric string. Submerging that lid traps dirty dishwater inside the reel, leading to rusted springs and frayed cords. Wipe the underside of a pull-cord lid clean with a soapy sponge and rinse lightly while keeping the string exit hole facing downward, or pry off the snap-fit inner lid cover if your model includes a removable splash guard.
Conclusion
Knowing how to use manual food chopper tools comes down to matching your prep work and hand motion to the mechanical design of your unit. By placing the blade assembly onto the center pin before loading your ingredients, pre-cutting produce into 1-inch chunks, and keeping the bowl half to two-thirds full, you allow the stainless steel blades to slice cleanly without jamming.
Counting your pulls or presses—three to five for coarse chunks, six to nine for a medium dice, and ten or more for a fine mince—gives you repeatable control over texture while processing dense carrots and onions ahead of soft tomatoes. Keeping your pull strokes strictly horizontal and avoiding rock-hard items like ice or whole winter squash protects both the drive gears and the cutting edges.
My recommendation is to start every new recipe with two fewer pulls than you think you need, then pop the lid to check the consistency. You can always add two extra pulls in three seconds, and building that quick habit guarantees crisp, uniform cuts for every meal.
FAQs About Using a Manual Food Chopper
Do you put the blade or the food in a manual food chopper first?
Always place the blade assembly onto the center guide pin inside the empty bowl before adding any food. If you fill the cup with vegetables first and try to push the blade column down through the pile, food chunks get trapped underneath the hollow bottom of the blade shaft, preventing the lid from locking flat and causing the rotor to bind.
Why does my pull-cord food chopper keep getting stuck?
A pull-cord chopper gets stuck when the bowl is overfilled past the two-thirds mark, the vegetable chunks are cut larger than 1.5 inches, or a firm piece of onion wedges tightly between the blade tip and the plastic wall. Open the lid, remove a few pieces of food, shake the bowl to redistribute the contents, and use short, brisk horizontal pulls rather than pulling upward at an angle.
Can you chop raw meat in a manual food chopper?
Yes, you can mince small batches of boneless, skinless raw meat—such as chicken breast, turkey, or pork tenderloin—in a sturdy pull-cord or hand-crank food chopper. Trim away all tough silver skin, tendons, and gristle first, cut the meat into 3/4-inch cubes, chill the cubes in the freezer for 15 minutes until firm to the touch, and fill the bowl only one-third full per batch.
How do I stop onions from turning into mush in a manual chopper?
Onions turn watery and mushy when the bowl is packed too full or the blades spin too many times, which crushes the plant cells instead of slicing them cleanly. Quarter a medium onion, fill the bowl only halfway, and use just 4 to 6 brisk, horizontal pulls. Pause after the third pull to tap the bowl on the counter so top pieces drop down evenly.
Why shouldn’t you pull a food chopper string all the way to the end?
Yanking the pull cord all the way to its physical stop puts sudden shock tension on the internal knot and coil spring inside the lid, which can snap the string or unhook the recoil spring. Pull the cord out smoothly about 12 to 15 inches per stroke and guide it back toward the lid without letting the plastic handle slam against the casing.
Can a manual food chopper crush ice or frozen fruit?
Most standard plastic manual food choppers are not built to crush solid ice cubes or rock-hard frozen fruit directly from the freezer, as the extreme density can bend thin stainless steel blades, crack the clear plastic bowl, or strip the nylon drive teeth inside the lid. Allow frozen berries or mango chunks to thaw on the counter for 10 to 15 minutes until a knife tip can pierce them slightly before chopping.