
How to Use Electric Food Chopper Appliances for Even Results
Operating a motorized kitchen chopper requires seating the work bowl onto the base, dropping the stainless steel blade onto the center spindle before adding 1-inch food cubes up to the two-thirds line, locking the safety lid, and pressing the pulse button in short one-second bursts. Three to four pulses yield a coarse dice, while continuous five-second holds create smooth purees.
Holding the power button down continuously or cramming whole vegetables into a compact cup ruins textures in seconds. Bottom layers liquefy into watery paste while large chunks stay wedged at the top, and running a small motor nonstop for over 30 seconds can overheat the internal windings or trip the thermal fuse.
Pulsing properly in pre-cut batches gives you crisp, uniform pieces for salsas, mirepoix, and bread crumbs in under ten seconds. You avoid dragging out a heavy full-size food processor, protect the motor gears from premature wear, and keep your fingertips safely away from exposed razor edges.
Motorized prep tools save substantial time and reduce knife accidents when handled correctly. According to U.S. Consumer Product Safety Commission National Electronic Injury Surveillance System data, powered countertop kitchen appliances and food choppers are involved in more than 18,000 emergency room visits across the United States each year, primarily when users reach into the bowl before the rotor stops or grab naked S-blades during cleanup. Knowing how to use electric food chopper safety interlocks and pulse controls eliminates those risks during daily meal prep.
In my research reviewing manufacturer manuals from KitchenAid, Cuisinart, and Ninja, I found that nearly all operational failures happen when users stack food into the bowl before seating the blade assembly onto the drive shaft. Below, I cover the main electric chopper designs, ingredient prep rules, step-by-step operating instructions, pulse-timing charts for different textures, and troubleshooting fixes.
Main Types of Electric Food Chopper Designs and Motor Styles
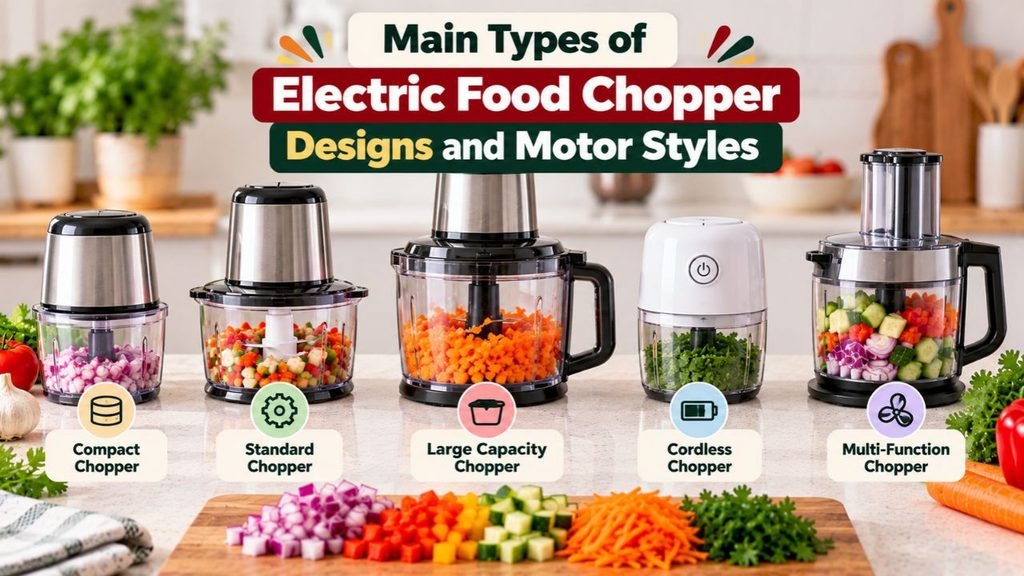
Before plugging in your unit or pressing the start switch, identify where the motor sits on your appliance. In my review of current U.S. countertop models, every electric food chopper falls into one of three structural layouts, and each one uses a slightly different locking sequence.
Bottom-Motor Base Electric Food Choppers
Bottom-drive choppers—such as the classic 3.5-cup and 5-cup models from KitchenAid and Cuisinart—feature a heavy motorized base that stays on the counter, a clear plastic work bowl with a side handle that twists onto the base, a single S-blade, and a locking top cover with a built-in safety tab. These units usually offer distinct Chop and Puree (or Grind) buttons that spin the blade in specific directions.
Top-Down Motor Pod Electric Food Choppers
Top-down choppers—popularized by Ninja Express Chop and glass-bowl meat and vegetable choppers—place the heavy electric motor inside a removable pod that rests on top of the bowl lid. Instead of twisting the bowl into a base, you set the glass or BPA-free plastic bowl on a non-slip mat, drop in the multi-level quad blade, place the splash guard lid on top, and seat the motor head onto the exposed metal drive spline.
Cordless USB Rechargeable Mini Electric Food Choppers
Cordless mini choppers range from tiny 1-cup garlic mincers to full 4-cup lithium-ion prep bowls. They operate with a single push button on top of the lid and require a full 3-to-4-hour USB charge before their first use so the battery delivers enough torque to slice through dense carrots or nuts.
| Electric Chopper Style | Motor Placement | Typical Bowl Size | Blade Design | Best Kitchen Tasks |
| Bottom-Motor Base | Beneath the work bowl | 3 to 5 cups | Single reversible or fixed S-blade | Salsas, dressings, pestos, breadcrumbs |
| Top-Down Motor Pod | Removable pod on top of lid | 2 to 8 cups | 4-blade stacked quad assembly | Mincing boneless meat, mirepoix, purees |
| Cordless USB Mini | Integrated into top cap | 1 to 3 cups | 2- or 3-blade mini spindle | Garlic, ginger, chilies, baby food portions |
Key Takeaway: Check whether your electric food chopper mounts the motor underneath the bowl, inside a detachable top pod, or inside a cordless USB lid so you align the safety locks properly before pressing the power switch.
How to Prep Ingredients Before Using an Electric Food Chopper

Even a 250-watt or 400-watt electric motor cannot chop evenly if a massive onion half wedges tightly between the blade and the side wall. Taking thirty seconds to prep your produce on a cutting board guarantees every piece finishes at the same size.
Cutting Food into Uniform 1-Inch Pieces
Slice raw vegetables, fruits, blocks of cheese, and boneless meats into uniform 1-inch cubes before placing them inside the work bowl. When you drop in pieces of widely different sizes—such as a half carrot alongside a tiny garlic clove—the smaller pieces turn into liquid pulp long before the larger chunk breaks down.
Following the Two-Thirds Bowl Capacity Rule
Never pack an electric food chopper to the rim. Fill the work bowl no more than two-thirds full for vegetables and dry ingredients, or half full when blending thin liquids and soups. Leaving empty space at the top allows the spinning blades to throw chopped pieces upward against the inner lid ribs so they cycle back down to the bottom for an even cut.
Cooling Hot Ingredients and Prepping Dry Before Wet
Do not pour boiling liquids, steaming roasted vegetables, or hot cooked lentils straight into a sealed plastic or glass chopper bowl. Trapped steam builds sudden internal pressure that can spray hot liquid out of the lid seams or warp polycarbonate plastic. Let cooked ingredients cool to lukewarm or room temperature first.
Tip: When a recipe calls for both dry and wet ingredients—such as grinding parmesan cheese, nuts, and dry garlic before blending them with olive oil into pesto—always process your dry ingredients first. That way, you do not have to stop and wash a wet, oily bowl halfway through prep.
Key Takeaway: Cut all raw vegetables, meats, and cheeses into even 1-inch cubes, let hot foods cool down, and cap your batch size at two-thirds of the bowl capacity so ingredients circulate freely.
How to Use Electric Food Chopper Units Step by Step
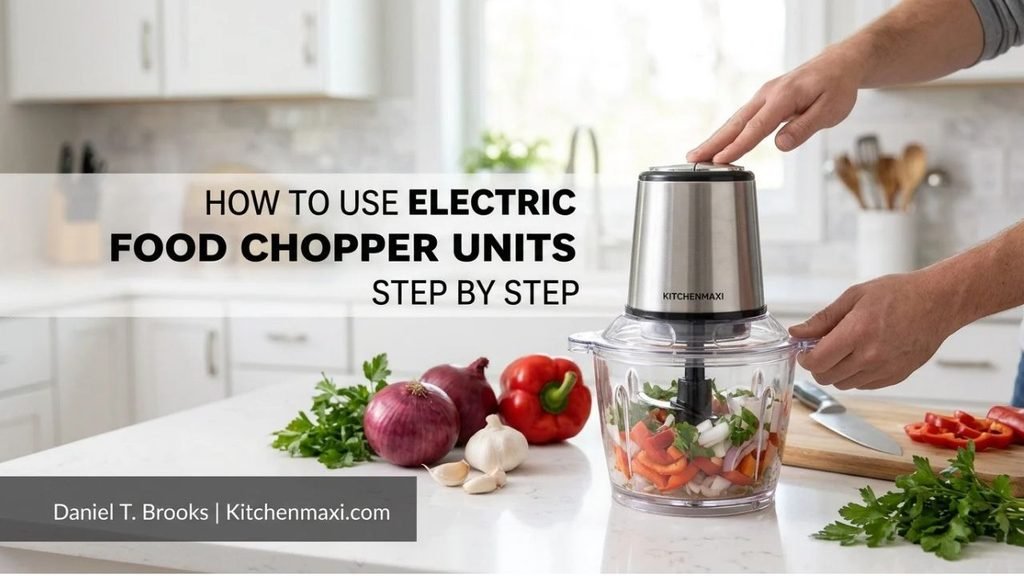
Because motorized choppers spin stainless steel blades at several thousand revolutions per minute, assembling the parts in the exact manufacturer sequence keeps the safety interlock working properly and prevents the rotor from wobbling on the spindle.
Safety Tip: Keep your Electric Food Chopper unplugged (or keep the top motor pod set aside on the counter) the entire time you are inserting the blade, loading food, or scraping the sides of the bowl. Never touch the metal blades directly; always hold the central plastic hub.
Step-by-Step Instructions for Bottom-Base and Top-Pod Choppers
Follow this sequence every time you operate your electric food chopper:
- Position the base or mat on a dry, flat counter: Set your motorized base—or the non-slip silicone ring of a glass top-pod bowl—on a level countertop away from the sink and hot stove burners.
- Lock the work bowl into place (bottom-motor models): Lower the clear work bowl onto the motor base with the handle offset slightly to the right (or left, depending on brand arrows), then rotate the bowl until it drops down and clicks securely onto the base lugs.
- Seat the blade assembly onto the center shaft FIRST: Grip the multipurpose blade by its upper plastic stem and slide it straight down over the central metal guide pin inside the empty bowl. Rotate the blade slightly until you feel it drop all the way down to the bottom of the shaft.
- Add your pre-cut 1-inch ingredients: Distribute your cubed food evenly around the blade up to the two-thirds mark.
- Lock the cover or splash lid: Place the lid onto the bowl and twist it until the locking tab clicks into the handle slot (on bottom-motor units) or sits completely flush with the silicone gasket sealed (on top-pod models). Bottom-base choppers will not power on unless the lid tab fully engages the safety switch in the handle.
- Connect power or seat the top motor pod: Plug the power cord into a grounded 120-volt outlet—or lower the top motor pod straight down onto the lid spline until it sits flat without wobbling.
- Pulse in short 1-to-2-second bursts: Press and hold the Pulse, Chop, or top power paddle for 1 to 2 seconds, then release your finger completely and wait for the blades to stop spinning. Repeat 3 to 6 times while watching the texture through the clear bowl walls.
- Wait for a complete stop and unplug before opening: Once the food reaches your target size, release the button, wait for the blade to come to a dead stop, unplug the cord (or lift off the top motor pod), unlock the lid, and pull the blade hub out before emptying the bowl.
Using the Drizzle Basin for Emulsions and Dressings
Many 3.5-cup and 5-cup electric food choppers include a small concave drizzle basin with a pinhole in the top cover. When making homemade mayonnaise, aioli, salad vinaigrettes, or chimichurri, start the chopper running with your egg yolk, mustard, garlic, or vinegar in the bowl, then pour your olive oil or vegetable oil directly into the shallow top recess. The pinhole meters the oil into the spinning blades in a thin, steady stream so the sauce emulsifies instead of separating.
Key Takeaway: Always drop the blade onto the empty bowl spindle before adding food, confirm the lid safety tab clicks into place, and keep the appliance unplugged until the exact moment you are ready to press the pulse button.
Mastering Speed Settings, Blade Direction, and Pulse Timing
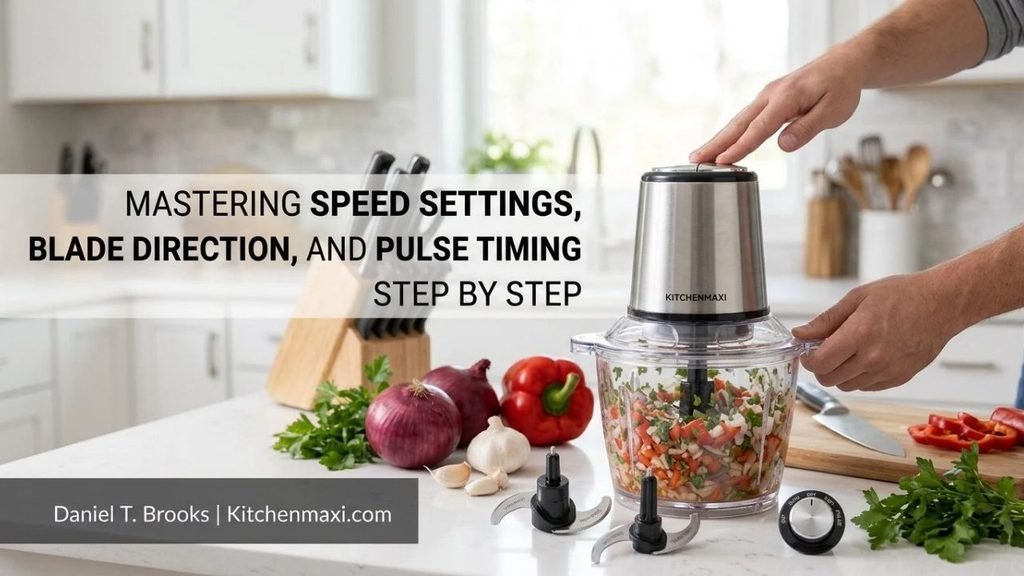
Understanding how your buttons control blade rotation is the secret to getting restaurant-style diced onions instead of baby food.
Chop vs. Puree / Grind Settings (Auto-Reversing Blades)
Have you ever wondered why choppers from Cuisinart and KitchenAid have two separate buttons labeled Chop and Grind (or Speed 1 / Chop and Speed 2 / Puree)? On Cuisinart models with an auto-reversing SmartPower blade, pressing Chop spins the blade in one direction so the sharp beveled edge slices cleanly through soft vegetables, garlic, and herbs without bruising them. Pressing Grind reverses the motor rotation so the blunt, flat spine of the blade strikes hard items like nuts, peppercorns, hard cheese, and crackers to pulverize them without dulling the sharp cutting edge.
On two-speed models like KitchenAid or Starfrit, Low (Speed I / Chop) runs at a slower RPM for coarse chunking, while High (Speed II / Puree) increases motor speed to blend cooked vegetables, hummus, and sauces into a silky paste.
Pulse Timing and Duty Cycle Guide
Never hold the button down continuously for more than 10 to 15 seconds when chopping solid foods. Most residential electric food choppers have a strict maximum continuous run time of 30 to 60 seconds, followed by a required 2-minute cooldown rest so the compact motor does not burn out.
| Ingredient | Pre-Cut Size & Max Batch | Setting to Use | Pulse Count / Hold Time |
| Onions, Peppers & Celery | 1-inch chunks (up to 2/3 full) | Chop / Low Speed | 3 to 5 one-second pulses |
| Garlic, Ginger & Chilies | Peeled whole cloves / 1-inch coins | Chop / High Speed | 5 to 8 short pulses (drop onto running blade for superfine mince) |
| Fresh Leafy Herbs (Dry) | Stemmed leaves (up to 1/2 full) | Chop | 4 to 6 quick pulses |
| Nuts, Crackers & Cookies | Shelled nuts / broken pieces | Grind or High Pulse | 6 to 10 pulses (or two 5-second holds) |
| Raw Boneless Meat | Chilled 1-inch cubes (1 cup max) | Chop / High Pulse | 6 to 8 two-second pulses |
| Cooked Veggies, Hummus & Avocado | 1-inch pieces + liquid | Puree / High Speed | Two or three 10-second holds, scraping sides between runs |
Pro Tip: To get an ultra-fine mince on just one or two cloves of garlic or a knob of fresh ginger, lock the empty bowl and lid in place, turn the electric food chopper on, and drop the peeled cloves straight down through the open feed chute (if your lid has one) onto the spinning blade. They will mince cleanly against the walls on first contact.
Key Takeaway: Use short 1-second pulses on the Chop or Low setting for coarse vegetables, switch to Grind or High for nuts and smooth purees, and always rest the motor after 30 to 40 seconds of cumulative operation.
Foods That Can Damage an Electric Food Chopper
Compact electric food choppers are built for everyday kitchen prep, not heavy commercial milling. Putting overly dense, sticky, or rock-hard ingredients inside the bowl can strip the nylon drive gear, bend the stainless steel S-blade, or crack the plastic work bowl. Avoid processing these items unless your owner’s manual explicitly lists an attachment or rating for them:
- Whole coffee beans and rock-hard whole spices (in standard choppers): Cinnamon bark, whole nutmeg, dried turmeric roots, and coffee beans gouge plastic bowls and chip thin S-blades. (Only models with a dedicated flat-spine Grind button are rated for small amounts of peppercorns or hard spices.)
- Solid freezer ice cubes and rock-hard frozen fruit: Unless you own a high-wattage top-pod model specifically rated for ice crushing (like the Ninja Express Chop), standard mini choppers will stall or snap their blade hubs on solid ice. Let frozen fruit rest on the counter for 10 minutes before pulsing.
- Bone-in meat, raw gristle, and un-trimmed sinew: Never put bones, cartilage, or tough raw beef tendons in a food chopper.
- Stiff bread dough or heavy pastry dough: Kneading stiff yeast dough places continuous high torque on a small motor without cooling airflow, quickly overheating the windings.
Troubleshooting Common Electric Food Chopper Issues
If your electric chopper refuses to turn on or stalls mid-batch, walk through these simple checks before assuming the appliance is broken.
The Motor Will Not Turn On When Pressing the Button
In 90% of cases, a silent bottom-base electric chopper has an unlatched safety interlock. Both the work bowl base and the top cover have small plastic tabs that must align together to depress a hidden micro-switch inside the motor housing. Twist both the bowl and the lid firmly until the lid handle lines up squarely over the bowl handle and clicks.
If the lid is locked and the motor still won’t run after heavy use, you likely triggered the automatic thermal overload protector. Unplug the chopper and let the motor cool down completely for 15 to 30 minutes; the internal reset switch will click back on automatically once the windings cool.
The Blade Stalls or Hums Without Spinning
When you hear the motor hum for a split second while the blade stands still, a dense chunk of carrot, cheese, or meat is wedged beneath the lower blade wing. Release the pulse button and unplug the unit immediately. Remove the lid, take out one-third of the food, redistribute the chunks with a spatula, and add a tablespoon of liquid if you are making a thick puree.
Food Sticks to the Sides While the Bottom Over-Processes
Static and moisture cause finely chopped herbs, garlic, and parmesan to plaster themselves against the vertical walls of the bowl above the blade path. Stop pulsing after every third burst, wait for the blade to stop, unplug the cord, and use a narrow silicone spatula to scrape the sides down toward the center before pulsing once or twice more.
Key Takeaway: If your electric food chopper won’t start, verify that both the bowl and lid locking tabs are clicked into alignment; if the blade stalls mid-chop, unplug the unit immediately and remove excess food rather than holding the button down.
Cleaning and Storing Your Electric Food Chopper Safely
Cleaning your chopper right after emptying the bowl prevents vegetable acids and starches from drying inside the hollow center of the blade shaft.
- Unplug the cord and lift the blade out first: Disconnect the power plug from the wall outlet before touching the lid. Always pull the sharp blade assembly out by its central plastic stem and set it on a plate—never leave it hidden inside a food-filled bowl or a soapy sink.
- Wipe the motor base or top pod with a damp cloth only: Never submerge the motorized base, top motor pod, or power cord in water or place them in the dishwasher. Wipe away splatters with a slightly damp microfiber cloth and dry thoroughly.
- Wash the bowl, lid, and blade: Hand-wash the work bowl, lid, silicone gasket, and stainless steel blade in warm, soapy water using a long-handled dish brush to clean inside the hollow blade column, or place dishwasher-safe bowls and lids on the top rack of your dishwasher.
- Dry completely and store unlocked: Let every component dry completely before reassembling. Store the blade safely inside the empty bowl with the lid resting loosely on top—not twisted into the locked position—so constant spring tension does not weaken the safety interlock tab over time.
Conclusion
Knowing how to use electric food chopper appliances safely and consistently comes down to three core habits: seating the blade onto the empty spindle before adding food, pre-cutting ingredients into uniform 1-inch cubes up to the two-thirds line, and pulsing in short 1-second bursts. When you give the food room to tumble and let the blades stop between pulses, you get even pieces without turning the bottom layer into mush.
Matching your speed or button selection to the ingredient—using Chop or Low for onions and herbs, Grind or High for nuts and purees, and the top drizzle basin for emulsified dressings—lets a compact countertop chopper handle dozens of daily prep jobs while protecting the motor from overheating.
My recommendation is to keep your pulse bursts under two seconds and check your progress through the clear bowl after the third tap. Stopping one pulse early and scraping down the sides with a spatula takes only five seconds and guarantees a clean, uniform texture every time you cook.
FAQs About Using an Electric Food Chopper
Do you put the blade in before or after the food in an electric chopper?
Always place the stainless steel blade assembly onto the center drive shaft inside the empty bowl before adding any ingredients. If you put food into the bowl first and try to push the blade down through the pile, food chunks get trapped inside the hollow underside of the blade hub, preventing it from seating on the spindle and stopping the lid from locking.
Why won’t my electric food chopper turn on even when plugged in?
Almost all electric food choppers feature a dual safety interlock system that blocks power unless both the work bowl and the top cover are twisted completely into their locked positions. Check that the bowl is clicked flat onto the base and rotate the lid until its locking tab snaps into the bowl handle slot. If the unit was recently run hard, unplug it for 20 minutes to let the thermal overload sensor reset.
Can you mince raw meat in an electric food chopper?
Yes, most 3-cup to 5-cup corded electric food choppers can mince small batches of boneless, skinless raw beef, pork, poultry, or fish. Trim off all bones, gristle, and tough connective tissue, cut the chilled meat into 1-inch cubes, load no more than 1 to 1.5 cups at a time, and process using 6 to 8 short two-second pulses so the meat stays textured rather than turning pasty.
What is the difference between a food chopper and a food processor?
An electric food chopper is a compact 1-cup to 5-cup appliance with a lower-wattage motor (typically 100 to 400 watts) and a single S-blade or quad blade meant for quick daily tasks like mincing garlic, chopping onions, grinding nuts, and blending small sauces. A full-size food processor holds 7 to 14 cups, uses a heavy induction motor, and includes interchangeable slicing and shredding discs plus dough blades for large batch prep.
Why does my electric food chopper puree the bottom and leave big chunks on top?
Uneven chopping happens when the work bowl is overfilled past the two-thirds mark, the raw vegetables were dropped in as large uneven wedges instead of 1-inch cubes, or you held the power button down continuously instead of pulsing. Cut all pieces to a uniform 1-inch size, fill the bowl only halfway to two-thirds full, and use 1-second pulses so top pieces fall down into the blades.
How long can you run an electric food chopper continuously?
Most countertop electric food choppers have a maximum continuous duty cycle of 30 to 60 seconds. Running the motor continuously for longer than a minute generates excess heat in the compact motor housing. Pulse in short bursts whenever possible, and if you are pureeing a thick dip or grinding nuts across multiple batches, let the motor rest for 2 minutes after every 40 seconds of operation.