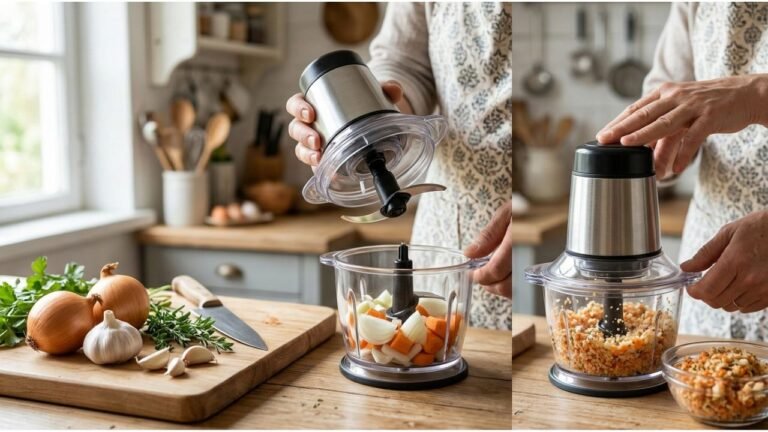
How to Clean a Vegetable Chopper: Wash Blades and Grids Safely
To clean a vegetable chopper, take apart its removable components, rinse away food residue, and wash the blades, chopping bowl, and lid with warm, soapy water. Use a soft cleaning brush to remove vegetables trapped between cutting blades or inside a dicing grid. Rinse the parts thoroughly and let them dry completely before putting the chopper back together.
The cleaning method depends on whether you have an electric chopper, a manual pull-cord model, or a grid-style vegetable dicer. Each has areas where onion pieces, garlic residue, and moisture can accumulate.
This guide covers safe cleaning steps, stubborn food removal, odor prevention, dishwasher compatibility, and everyday maintenance.
How to Clean a Vegetable Chopper Step by Step
Most vegetable choppers can be cleaned with mild dish soap, warm water, and a soft brush. However, sharp cutting components and electrical parts require different handling.
The following steps apply to most household vegetable choppers, with adjustments based on the manufacturer’s cleaning instructions.
Step 1: Unplug and Disassemble the Vegetable Chopper
If you’re using an electric vegetable chopper, switch it off and disconnect the power cord before removing any parts.
For cordless models, turn off the appliance and remove the detachable battery if the manufacturer instructs you to do so.
Wait until the blades have stopped completely.
Next, remove the lid, chopping container, and blade assembly in the order specified for your model.
For manual choppers, release the lid or locking mechanism and separate the removable components.
Hold sharp blades by their plastic frames, central hubs, or designated handles. Never grasp the exposed cutting edges.
Place the parts separately on a clean countertop so they remain visible and easy to handle.
Read More: how to clean oxo good grips vegetable chopper
Step 2: Remove Leftover Vegetable Pieces
Empty any remaining chopped vegetables from the collection container.
Use a silicone spatula to remove food stuck to the bowl walls or around the blade assembly.
If your chopper uses a square dicing grid, inspect the small openings for trapped onion, potato, carrot, or pepper pieces.
Many grid-style vegetable choppers include a specialized cleaning brush or plastic tool.
Use this tool to push trapped vegetables out from the safer, non-cutting side of the grid whenever the design allows.
Avoid pushing food through sharp openings with your fingers.
Removing large food particles before washing prevents them from collecting in the sink and makes the remaining cleanup easier.
Step 3: Rinse the Removable Parts With Warm Water
Rinse the chopping bowl, removable blade assembly, and other washable components under warm running water.
A gentle stream of water helps loosen small pieces of vegetables and surface residue.
For rotating blades, hold the assembly by its center hub while directing water around the blade surfaces.
Keep the cutting edges pointed away from your hands.
Do not place loose blades into a sink filled with cloudy, soapy water. Hidden blades are difficult to locate and can cause cuts when reaching into the sink.
If food has dried onto the container, let the washable part soak briefly in warm, soapy water. Avoid soaking components containing electrical, spring, or pull-cord mechanisms unless the manufacturer permits it.
Step 4: Wash the Bowl, Blades, and Lid With Dish Soap
Fill the chopping bowl or a separate washing container with warm water and a small amount of mild dish soap.
Use a soft sponge or nonabrasive dishcloth to clean the bowl’s interior and exterior surfaces.
Pay attention to corners, grooves, and areas near the central spindle where vegetable particles may collect.
For the cutting blade, use a soft dishwashing brush and clean away from the sharp edges.
Avoid rubbing your fingers along the cutting surfaces.
Wash the lid carefully, especially around its rim and removable seals.
If your chopper has a pull-cord mechanism, clean the exterior of the lid according to the manufacturer’s instructions. Some pull-cord lids should only be wiped clean and must not be submerged.
Step 5: Clean the Blade Grid and Pusher Plate
Grid-style vegetable choppers need additional attention because pieces of vegetables can become trapped between closely spaced cutting edges.
Remove the cutting grid if the design allows it.
Use the supplied cleaning brush to remove pieces caught between the blades.
Inspect the pusher plate, the part that forces vegetables through the grid.
Small pieces of onion, garlic, and potato can become lodged between its raised plastic sections.
Some models have a removable cleaning grid or pusher plate that makes these areas easier to access.
Clean these components separately when the manufacturer permits removal.
Never use a knife, metal pick, or other sharp object to force stuck vegetables out. Doing so may damage the blades or plastic frame.
Step 6: Rinse Away Soap and Inspect the Parts
Rinse all washable components under clean running water until the soap and loosened food residue are gone.
Inspect the blade connections, bowl corners, lid grooves, and cutting grid.
If food particles remain, repeat the cleaning process with a soft brush.
Also check the area around the bowl’s central post, where small food fragments sometimes collect.
Thorough rinsing matters because leftover detergent can leave an unpleasant taste or film on food-contact surfaces.
Step 7: Dry the Vegetable Chopper Completely
Place the clean components on a stable dish-drying rack or clean towel.
Position sharp blade assemblies where they cannot slide, fall, or be accidentally touched.
Allow water to drain from narrow spaces around the blade hubs and plastic frames.
You can dry accessible surfaces with a clean towel while keeping your hands away from the cutting edges.
Pay particular attention to:
- Blade attachment points
- Cutting grid openings
- Lid grooves
- Removable seals
- Bowl corners
- Storage compartments for interchangeable blades
Do not reassemble the chopper while moisture remains trapped inside its components.
Drying thoroughly helps prevent unpleasant odors and moisture-related damage during storage.
How to Clean Different Types of Vegetable Choppers
Although most vegetable choppers use similar washing methods, their mechanical designs affect which parts can safely come into contact with water.
| Vegetable Chopper Type | Cleaning Method | Important Precaution |
| Electric vegetable chopper | Wash removable food-contact parts and wipe the motor housing | Never immerse the electrical base |
| Manual pull-cord chopper | Wash the bowl and removable blades; clean the lid as directed | Avoid soaking the cord mechanism unless permitted |
| Grid-style vegetable chopper | Remove food from the grid and pusher plate with a brush | Keep fingers away from cutting openings |
| Push-down vegetable chopper | Clean the removable blade, housing, and collection cup | Check whether the spring mechanism can be washed |
| Interchangeable-blade vegetable dicer | Clean each blade insert separately | Use protective blade holders during storage |
Cleaning an Electric Vegetable Chopper
Electric vegetable choppers contain a motor that should not come into direct contact with water.
After unplugging the appliance, remove its bowl, lid, and chopping blade.
Wash the removable parts with warm, soapy water or place them in the dishwasher if the model’s instructions allow it.
Wipe the motor base using a slightly damp cloth.
If vegetable juice has splashed onto the base, remove it promptly without allowing moisture to enter the electrical controls or ventilation openings.
Never place the motor housing under running water or immerse it in the sink.
Certain KitchenAid electric food choppers have dishwasher-safe bowls, lids, and blades, but that does not mean every electric chopper has the same cleaning requirements.
Cleaning a Manual Pull-Cord Vegetable Chopper
Pull-cord choppers contain a mechanical system that rotates the blades when you pull the handle.
The container and removable blade assembly may be washable, but the lid requires special care.
Some manual choppers have a sealed pull-cord mechanism that should not be immersed in water.
For example, the Zyliss Easy Pull Food Processor has a dishwasher-safe bowl and blade unit, while its pull-cord lid requires cleaning without immersion.
Remove the blade assembly and wash the compatible food-contact parts separately.
Use a damp cloth to wipe the lid if the instructions require it.
Pay attention to food residue near the underside of the lid, but do not force water into the cord opening.
Allow the mechanism and external surfaces to dry before storage.
Cleaning a Grid-Style Vegetable Chopper
Grid-style choppers often require the most detailed cleaning because their small cutting openings trap vegetable pieces.
Remove the interchangeable blade insert by holding its frame.
If your model includes a removable pusher plate, detach it according to the instructions.
Use a nylon cleaning brush or the supplied tool to clear the grid openings.
Wash each part separately with mild dish soap and warm water.
Rinse the cutting grid from the safe side while holding its frame securely.
Make sure no vegetable fibers remain caught between the cutting edges.
Dry the metal grid completely before placing it in its storage compartment.
How to Remove Stuck Vegetables From a Chopper Blade
Onions, carrots, potatoes, and other vegetables can become trapped inside cutting grids or around rotating blade assemblies.
The safest removal method depends on the size and position of the trapped pieces.
Removing Onion and Garlic Pieces
Onions and garlic can leave small, sticky fragments around a blade grid.
Start by rinsing the washable component with warm water.
Then use a soft cleaning brush to remove the remaining pieces.
For tightly packed grid openings, brush gently from the non-cutting side rather than pushing directly against sharp edges.
If the residue has dried, soak the removable, water-safe part briefly in warm, soapy water before brushing again.
Removing Potato and Carrot Pieces
Potatoes and carrots may leave firm pieces wedged between narrow cutting blades.
If these pieces do not wash away immediately, use the manufacturer’s recommended cleaning tool.
Forcing them out with a metal utensil can bend delicate cutting edges or damage the grid.
If the grid is removable, cleaning it separately provides better access to the trapped vegetables.
Cleaning Around Rotating Blades
Rotating blade assemblies can collect vegetable fibers around the central shaft.
Remove the blade from the bowl before attempting to clean this area.
Hold the assembly by its designated grip and use a small, soft brush around the hub.
If the blade contains a fixed housing or sealed bearing, do not attempt to dismantle it unless the manual specifically describes that procedure.
How to Remove Vegetable Chopper Odors and Stains
Vegetables such as onions and garlic can leave lingering odors in plastic chopping containers.
Tomatoes, carrots, and beets may also discolor certain plastic surfaces.
Cleaning the chopper promptly helps reduce these problems.
Getting Onion and Garlic Smells Out of a Chopper
First, wash the removable food-contact components with warm water and mild dish soap.
Pay attention to the lid rim, seals, and any narrow grooves that might retain food residue.
If the smell remains, check whether the manufacturer permits using a mild baking soda solution on the affected plastic parts.
Baking soda may help reduce some lingering odors, but it does not replace normal cleaning and sanitizing.
Rinse the treated surfaces thoroughly and let them dry.
Do not use strong fragrances to mask odors, and avoid applying unapproved cleaning mixtures to metal blades or mechanical components.
Removing Vegetable Stains From Plastic
Some vegetables contain natural pigments that can discolor plastic chopping containers.
Wash the container promptly after preparing deeply colored vegetables.
Use mild dish soap and a soft sponge.
If staining remains, consult the manufacturer’s care instructions before trying a stain-removal treatment.
Avoid rough scouring pads or abrasive powders because they can scratch plastic surfaces.
Light discoloration does not necessarily mean the container is dirty. However, visible food residue or an oily film indicates that additional washing is needed.
Preventing Musty Smells During Storage
A musty smell may develop when moisture or food residue remains inside an assembled chopper.
Before storing it, make sure the bowl, lid, blades, and removable seals are thoroughly clean and dry.
Do not close a damp container tightly for long-term storage.
If you notice visible mold or residue in an inaccessible area, do not continue using the chopper until it can be cleaned safely. Replace affected parts when proper cleaning is not possible.
Can You Put a Vegetable Chopper in the Dishwasher?
Some vegetable choppers are dishwasher-safe, but compatibility depends on the specific model and component.
Many electric choppers have dishwasher-safe bowls, lids, and removable blades. Some models require these parts to be placed on the top rack.
Other vegetable choppers are designed for handwashing only.
Before using a dishwasher, check the manual or the dishwasher-safe markings on the appliance.
The following guidelines can help:
- Plastic chopping bowl: May be dishwasher-safe, depending on the material and manufacturer.
- Stainless steel blade assembly: Some models allow dishwasher cleaning, while others require handwashing.
- Interchangeable cutting grids: Dishwasher compatibility varies by product.
- Pull-cord lid: Often requires handwashing or wiping because of the internal mechanism.
- Electric motor base: Must never be placed in a dishwasher.
- Removable rubber seals: Follow the manufacturer’s specific care instructions.
If the manual is unavailable and dishwasher compatibility cannot be confirmed, handwashing the removable food-contact parts with mild soap is generally the more cautious approach.
Keep all electrical components out of the water.
How Often Should You Clean a Vegetable Chopper?
Clean your vegetable chopper after every use, even if you only processed a small amount of garlic or herbs.
Food particles and moisture can remain around the blade assembly, lid, and collection container.
For everyday vegetable preparation, a thorough wash and complete drying are usually sufficient.
Additional cleaning attention may be necessary when switching between foods that could cause cross-contamination.
For example, if a manufacturer-approved chopper has been used to process raw meat or poultry, clean its food-contact surfaces thoroughly and sanitize them using a method approved for those materials before preparing ready-to-eat vegetables.
Cleaning removes visible soil and residue, while sanitizing reduces microorganisms to safer levels.
Follow food-contact sanitizer instructions carefully, including any required dilution, contact time, and rinsing procedure.
Common Vegetable Chopper Cleaning Mistakes
Cleaning mistakes can shorten the life of a vegetable chopper or make handling its blades unnecessarily dangerous.
Leaving Food Residue Inside the Chopper
Vegetable fragments can dry inside the blade grid, around the central spindle, or under the lid.
Once dried, these pieces become more difficult to remove.
Clean the chopper soon after use rather than allowing residue to harden.
Cleaning Sharp Blades With Bare Fingers
Vegetable chopper blades can cut skin even when they are not moving.
Avoid wiping directly along sharp edges or reaching into small grid openings.
Use a soft cleaning brush and hold the blade assembly by its designated frame or handle.
Washing Electrical Components Under Running Water
An electric chopper’s motor housing may contain switches, wiring, and other components that can be damaged by water.
Wipe the exterior with a damp cloth instead of rinsing it under the faucet.
For cordless models, follow the manufacturer’s instructions for battery removal and cleaning.
Using Abrasive Cleaning Tools
Steel wool, rough scouring pads, and sharp metal tools can scratch plastic containers or damage blade components.
A soft sponge and nonabrasive brush are generally more appropriate.
Avoid harsh chemicals unless the manufacturer explicitly approves them for the material.
Storing the Chopper Before It Dries
Moisture can remain trapped inside the chopping bowl, blade holder, and lid grooves.
Reassembling the parts while wet may cause unpleasant odors or contribute to corrosion on susceptible metal components.
Allow all surfaces to dry before storage.
How to Keep Your Vegetable Chopper Clean and Working Properly
Regular maintenance helps preserve the chopper’s cutting performance and prevents unnecessary buildup.
A few practical habits make a difference:
- Clean immediately after use. Fresh vegetable residue is usually easier to remove than dried food.
- Use the supplied cleaning brush. It is often designed to reach the grid openings and narrow spaces.
- Keep blade edges protected. Store removable cutting grids in their designated holders or covers.
- Inspect plastic components. Look for cracked frames, damaged locking tabs, and worn connections.
- Check blade condition. Bent, chipped, or damaged blades should not remain in use.
- Avoid unnecessary moisture exposure. Keep motor housings, batteries, and non-washable mechanisms dry.
- Follow the appliance manual. Use only approved cleaning agents and methods for your specific model.
Do not attempt to sharpen, straighten, or repair removable blade grids unless the manufacturer provides an approved procedure.
If a blade or its mounting frame becomes damaged, replacing the compatible component is generally safer than attempting an improvised repair.
Conclusion
Knowing how to clean a vegetable chopper correctly helps keep its food-contact surfaces clean, its blades protected, and its moving components in good condition.
Disassemble the removable parts, clear trapped food with a soft brush, wash compatible components with warm, soapy water, and rinse thoroughly. Dry everything before reassembly, especially the cutting grids and blade connections.
For electric choppers, keep the motor housing away from water. For manual pull-cord models, protect the internal mechanism from moisture unless the manufacturer permits washing it.
Cleaning after every use is the simplest way to prevent stubborn buildup and keep your vegetable chopper ready for the next meal.
FAQs About How to Clean a Vegetable Chopper
What Is the Easiest Way to Clean a Vegetable Chopper Blade?
The easiest method is to remove the blade assembly, rinse it under warm water, and use a soft dishwashing brush with mild soap.
Hold the blade by its plastic hub or frame and keep your fingers away from the sharp edges. Rinse thoroughly and dry before storing.
Can You Soak Vegetable Chopper Blades in Water?
Some removable blade assemblies can be soaked briefly in warm, soapy water to loosen dried food.
However, avoid soaking blades with non-waterproof mechanisms or components the manufacturer says must remain dry. Never leave loose blades hidden in a sink full of water.
How Do You Clean a Vegetable Chopper Without a Brush?
For accessible surfaces, use a soft sponge or dishcloth while avoiding direct contact with the cutting edges.
However, narrow dicing grids are difficult to clean safely without an appropriate tool. A small nylon cleaning brush is usually the better option for removing food trapped between the blades.
Can Vinegar Be Used to Clean a Vegetable Chopper?
Diluted vinegar may help with some odors or mineral deposits on compatible materials, but it is not a substitute for washing with dish soap.
Check the manufacturer’s instructions before using vinegar, especially on metal blades, coated parts, or components containing seals. Do not mix vinegar with bleach or other cleaning chemicals.
How Do You Clean a Vegetable Chopper That Has Dried Food Stuck Inside?
Remove the washable components and soak them briefly in warm, soapy water if the manufacturer permits.
Once the residue softens, use a soft brush or the supplied cleaning tool to remove it. Avoid scraping the cutting edges with metal utensils, and rinse and dry the parts thoroughly afterward.