How to Assemble Food Chopper Parts: Bowl, Blade, and Lid Setup
To assemble a food chopper, start by positioning the chopping bowl, installing the blade on its central shaft, and securing the lid. For electric models, attach the bowl to the motor base or place the motor unit on top, depending on the design. Manual choppers generally require a blade assembly, container, and operating lid.
The correct assembly order matters because poorly fitted components can prevent the blades from rotating or stop an electric chopper from starting. Some models also use safety locks that only engage when the parts are properly aligned.
This guide explains how to assemble electric and manual food choppers, position their blades, secure their lids, and correct common assembly problems.
Food Chopper Parts You Need Before Assembly
Before putting a food chopper together, identify its main components. Although the exact design varies, most models contain several removable parts that work together.
| Food Chopper Part | Main Function |
| Motor base or power pod | Powers the blades in electric models |
| Chopping bowl | Holds ingredients during chopping |
| Blade assembly | Cuts food into smaller pieces |
| Central spindle or drive shaft | Supports or drives the blade assembly |
| Chopping lid | Covers the container and helps secure the assembly |
| Locking tabs or mechanism | Keeps compatible components properly connected |
| Rubber base or nonslip ring | Helps stabilize certain models |
| Pull cord or push handle | Operates the blades in manual models |
Some electric choppers also include a drive adapter, splashguard, removable gasket, or additional mixing attachment.
Not every component is removable. For example, the motor and drive shaft may be integrated into a single housing.
Important: Identify your particular model before assembling it. A chopper with a motor underneath the bowl requires a different setup from one with a removable motor unit positioned above the lid.
Read More: how to use a mini food chopper
How to Assemble Food Chopper Parts on an Electric Model
Most electric food choppers with a bottom-mounted motor follow a similar assembly process.
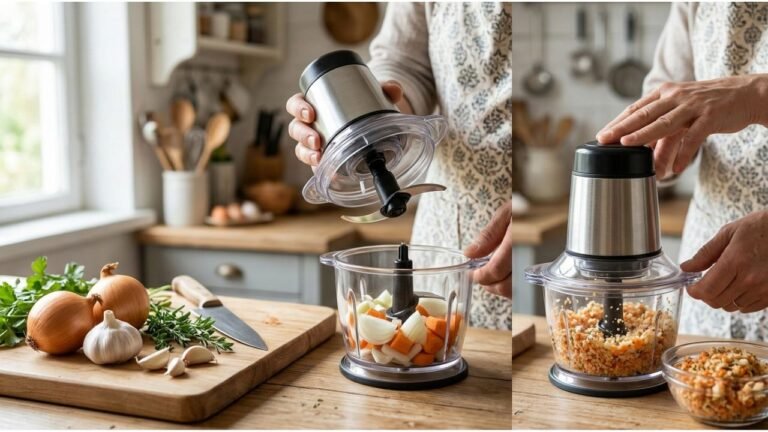
The usual order is motor base, chopping bowl, blade assembly, ingredients, and lid. However, the exact locking direction and blade attachment method depend on the manufacturer.
Step 1: Unplug the Food Chopper and Prepare the Parts
Place the motor base on a clean, dry, level countertop.
Make sure the appliance is disconnected from the electrical outlet before handling its removable components.
If the food chopper is new, wash the bowl, blade, and lid according to the manufacturer’s instructions before the first use.
Dry the components thoroughly, especially around any connecting surfaces that must remain dry.
Inspect the bowl, blade holder, and locking tabs for visible damage.
Avoid assembling the appliance if you notice cracked plastic, bent blades, or damaged mounting points.
Read More: is a food chopper the same as a food processor
Step 2: Attach the Chopping Bowl to the Motor Base
Position the chopping bowl above the motor base.
Look for the alignment tabs, grooves, or locking slots that connect the two components.
On many models, you need to place the bowl slightly off-center and rotate it until it locks into position.
Other designs use a snap-in or downward-locking mechanism.
Follow the directional markings on your appliance rather than assuming every bowl twists clockwise.
When attached correctly, the bowl should sit securely on the base without excessive movement.
Do not force the bowl into place. If it resists, remove it and check whether the alignment tabs match the slots.
Step 3: Install the Food Chopper Blade Assembly
Locate the central spindle or drive shaft inside the chopping bowl.
Hold the blade assembly by its plastic center hub or designated handle, keeping your fingers away from the metal cutting edges.
Carefully lower the blade over the spindle.
Depending on the model, the blade may:
- Slide directly onto the central shaft.
- Require slight rotation to align with the drive mechanism.
- Lock into position when pressed down.
- Fit onto a separate drive adapter installed beforehand.
Make sure the blade reaches its intended operating position.
For example, certain KitchenAid food choppers require the blade to be rotated and pressed down until it locks.
Do not assume that every chopper uses the same mechanism.
Common Mistake: Forcing a blade onto a misaligned shaft can damage the plastic coupling. If the blade does not fit naturally, check its orientation and the model’s assembly instructions.
Step 4: Position the Ingredients Inside the Bowl
Once the blade is installed, add the ingredients you want to chop.
Cut large vegetables into smaller pieces before placing them in the container.
Distribute the ingredients around the blade rather than packing everything tightly on one side.
Keep the food below the maximum fill marking or recommended capacity.
Avoid adding ingredients that are too large, too hard, or otherwise unsuitable for your appliance.
This step is important because removing the lid repeatedly to adjust an overloaded bowl can increase handling around sharp blades.
Step 5: Secure the Food Chopper Lid
Position the lid above the chopping bowl.
Look for any alignment arrows, tabs, or markings showing where the lid should connect.
Depending on the model, you may need to:
- Match the lid tabs with the bowl openings.
- Lower the lid carefully into position.
- Rotate the lid in the indicated direction.
- Continue until the locking mechanism engages.
Some food choppers make a clicking sound when the lid locks, while others use a latch or a different mechanism.
The lid should fit evenly without sitting at an angle.
If the lid does not lock, check the bowl and blade positioning before applying more pressure.
Step 6: Check the Assembly Before Connecting Power
Before plugging in the appliance, inspect the assembled components.
Confirm that:
- The chopping bowl is correctly positioned.
- The blade assembly is seated on its shaft.
- The lid is fully secured.
- No food is trapped between locking surfaces.
- The motor housing and electrical connections are dry.
- The appliance is sitting on a stable countertop.
Once everything is properly assembled, connect the appliance to power and operate it according to the manufacturer’s instructions.
Do not run the chopper empty unless the manual explicitly permits it.
How to Assemble a Food Chopper With a Motor on Top
Some compact electric choppers have a removable motor unit that sits directly above the chopping bowl.
These models do not use the same bowl-locking arrangement as electric choppers with motors underneath.
Their assembly usually follows this order:
- Place the chopping bowl on a flat, stable surface.
- Hold the blade assembly by its center shaft.
- Lower the blade onto the spindle inside the bowl.
- Add the prepared ingredients around the blade.
- Place the splashguard or operating lid over the bowl.
- Align the motor unit with the lid’s drive connection.
- Seat the motor unit securely according to its instructions.
For example, certain Ninja compact choppers use a removable power pod above a splashguard.
In this design, the blade must be positioned inside the bowl before the power unit is attached.
Safety Note: Never attach a loose chopping blade directly to a top-mounted motor unit and then attempt to lower the exposed blade into the bowl unless the manufacturer specifically instructs that procedure.
Always use the intended blade installation method.
How to Assemble a Manual Pull-Cord Food Chopper
Manual pull-cord choppers use a retractable cord to rotate the chopping blades.
They normally contain a bowl, a removable blade assembly, and a lid with the cord mechanism.
Step 1: Position the Blade in the Bowl
Place the container on a clean, level countertop.
Hold the blade assembly by its central plastic shaft and lower it onto the supporting pin inside the bowl.
The blade holder should sit in its intended position without being forced.
If your model includes a sweeper arm or other accessory, install it according to the manual before closing the lid.
Step 2: Add the Ingredients
Cut vegetables into manageable pieces and place them around the blade.
Avoid overfilling the container.
A smaller quantity allows the blades to rotate more freely during operation.
Make sure no ingredients obstruct the blade shaft or the lid’s connecting mechanism.
Step 3: Attach the Pull-Cord Lid
Position the lid above the chopping bowl.
Align the drive connection underneath the lid with the upper section of the blade shaft.
Lower the lid carefully, ensuring the parts connect properly.
Depending on the design, secure the lid by twisting it or engaging its locking tabs.
Do not pull the cord until the lid is fully attached.
Step 4: Check the Pull-Cord Mechanism
Hold the container securely on a stable surface.
Make sure the lid does not lift or separate when the cord handle is operated.
Pull the cord smoothly within the manufacturer’s permitted travel distance.
Avoid jerking the handle or pulling the cord completely beyond its intended limit.
If the cord feels unusually stiff, stop and inspect the assembly rather than forcing the mechanism.
How to Assemble Push-Down and Grid-Style Food Choppers
Not all manual choppers contain rotating blades.
Push-down and grid-style designs use different cutting mechanisms, so their components must be assembled differently.
Assembling a Push-Down Food Chopper
A push-down chopper commonly uses a vertical blade mechanism activated by pressing a handle.
Depending on the design, assembly may involve:
- Positioning the chopping cup or collection container.
- Attaching the blade mechanism to its intended housing.
- Securing the handle or upper assembly.
- Placing the unit on a stable work surface.
- Checking that the components are properly connected.
Some push-down models work directly on a cutting board instead of using a collection bowl.
Ensure the blade housing is properly secured before pressing the handle. Keep your hands away from the cutting area.
Assembling a Grid-Style Vegetable Chopper
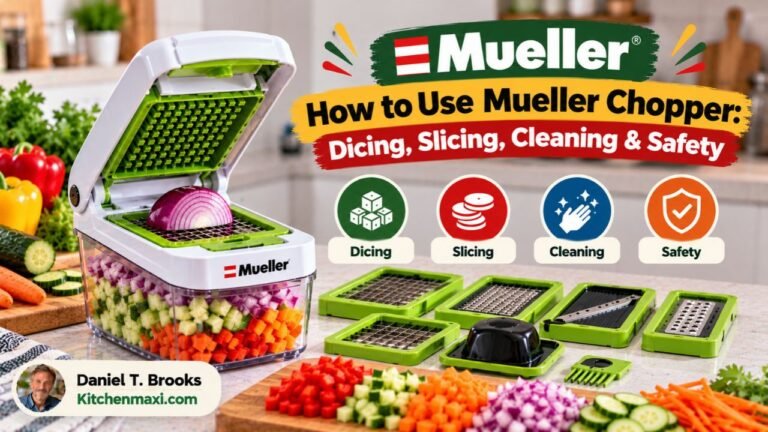
Grid-style choppers cut vegetables by pushing them through a fixed cutting grid.
These devices often include interchangeable blade grids and a matching pusher plate.
To assemble one:
- Attach the collection container to its frame, if applicable.
- Insert the chosen cutting grid into its designated holder.
- Make sure the grid is seated securely.
- Check that the pusher plate aligns with the grid openings.
- Close or position the pressing mechanism according to the manufacturer’s instructions.
Never operate a grid-style chopper with a loose cutting grid or mismatched pusher plate.
An incorrect fit can damage the cutting components or make the mechanism difficult to close.
Why Your Food Chopper Bowl or Lid Won’t Lock
A food chopper that refuses to lock is often experiencing an alignment problem rather than a mechanical failure.
Before applying additional pressure, inspect the connection points.
| Assembly Problem | Possible Cause | Recommended Fix |
| Bowl won’t attach to the base | Tabs are not aligned | Remove the bowl and match the locking slots |
| Lid won’t close completely | Bowl, lid, or blade is positioned incorrectly | Recheck the assembly sequence |
| Blade won’t fit on the shaft | Incorrect orientation or incompatible attachment | Inspect the drive connection and manual |
| Lid sits unevenly | Ingredient or debris is blocking the rim | Remove the obstruction and reseat the lid |
| Chopper won’t turn on | Safety lock may not be engaged | Check that the bowl and lid are secured |
| Blade does not rotate properly | Drive coupling is not fully engaged or is damaged | Inspect the blade holder and shaft |
| Pull-cord lid won’t operate smoothly | Lid drive connection is misaligned or the load is excessive | Reposition the lid and reduce the load |
What if the Bowl Won’t Twist Into Place?
Check whether the bowl is positioned at the correct starting angle.
Some designs require the bowl handle to begin on one side before rotating toward the locked position.
Look for arrows or raised alignment markers.
Do not assume that clockwise rotation is correct for every model.
If the bowl is difficult to turn, inspect the slots for trapped food particles or damaged plastic.
What if the Blade Is Not Sitting Correctly?
Remove the blade carefully by its center hub and inspect the shaft.
Look for an incorrectly positioned adapter, food debris, or an obstruction.
Reinstall the blade using the intended alignment method.
If the blade hub is cracked or the coupling is visibly worn, stop using the appliance until the appropriate replacement is available.
What if the Food Chopper Still Won’t Start?
An incorrectly fitted bowl or lid may prevent an electric chopper from operating because of its safety interlock.
Unplug the appliance and repeat the assembly process.
If all components are properly secured, inspect the power connection and consult the manufacturer’s troubleshooting instructions.
Never bypass the lid sensor, locking switch, or other protective mechanism to make the chopper operate.
Food Chopper Assembly Mistakes That Can Damage the Appliance
Most assembly problems are preventable when you understand how the parts connect.
Forcing the bowl or lid into place: Excessive pressure can damage plastic tabs, hinges, or locking slots. Realign the components instead of forcing them.
Installing the blade backward or incorrectly: An improperly positioned blade may not connect with the drive shaft. Follow the manufacturer’s specified blade orientation.
Leaving out a required drive adapter: Some models use a separate adapter to connect the blade to the motor. Missing this component may prevent proper operation.
Attaching the wrong accessory: Certain food choppers include chopping blades, whisk attachments, or interchangeable cutting parts. Use only the accessory intended for that assembly.
Handling blades by their cutting edges: Sharp metal blades can cause cuts even when the appliance is disconnected from power. Lift them using their designated grip.
Ignoring damaged locking components: Cracked tabs or broken clips may prevent the appliance from remaining securely assembled.
Correct assembly should not require excessive force. If a part seems incompatible or does not align with the others, verify the model and accessory before proceeding.
How to Disassemble and Store a Food Chopper After Use
Knowing how to take apart a food chopper is just as useful as understanding its assembly.
For an electric model, turn it off, disconnect the power, and wait until the blade stops completely.
Remove the lid according to its locking mechanism.
Carefully lift the blade assembly using its designated handle or hub.
Detach the bowl from the motor base if applicable.
For a top-mounted motor design, remove the motor pod before opening the bowl.
For a manual pull-cord model, remove the lid and lift out the blade assembly. Keep the pull-cord mechanism away from water unless the manufacturer explicitly permits immersion.
Wash the removable food-contact components according to the product instructions. Some parts are dishwasher-safe, while others require handwashing.
Dry everything thoroughly before storing.
Keep loose blades inside a protective cover or a safely assembled container, as recommended by the manufacturer.
Avoid storing sharp, uncovered blades loose in a kitchen drawer.
Conclusion
Understanding how to assemble food chopper parts makes it easier to prepare ingredients safely and avoid common problems with loose lids, misaligned blades, and bowls that won’t lock.
For most bottom-motor electric models, attach the bowl to the base, install the blade, add ingredients, and secure the lid. Top-mounted motor choppers and manual models follow different arrangements, so always match the assembly method to the appliance design.
Check that each component is securely positioned before operating the chopper. Never force a part that does not fit or bypass a safety lock to make the appliance work.
FAQs About How to Assemble Food Chopper
Should You Put the Blade or Food Into the Chopper First?
For most food choppers with a removable central blade assembly, install the blade before adding ingredients.
This allows the blade to reach its intended position without food obstructing the shaft. Follow your specific model’s instructions if its assembly sequence differs.
Does the Food Chopper Blade Need to Click Into Place?
Not always. Some electric food choppers have blades that lock onto the shaft with a click, while others use a removable blade assembly that simply rests on a supporting spindle.
The correct attachment depends on the model. Do not force a blade to click if the manufacturer does not specify a locking mechanism.
Can You Use a Food Chopper Without Locking the Lid?
No. You should not operate a food chopper with an unsecured operating lid.
Many electric models include safety interlocks that prevent the motor from running unless the lid is properly attached. Never bypass these protections or hold an incompatible lid in place manually.
Can You Use a Different Blade in Your Food Chopper?
Only use replacement blades and attachments that the manufacturer identifies as compatible with your model.
Even if another blade looks similar, differences in shaft size, height, locking design, or clearance may prevent safe operation.
Does Every Food Chopper Need a Rubber Gasket?
No. Some models use a removable sealing ring, while others do not require a gasket.
If your model includes one, install it in the specified groove and orientation. Avoid adding an aftermarket gasket or seal that was not designed for the appliance.